반응형
* C# 프로그램 재시작 예제...

전체 소스 코드
Form1.cs
using System;
using System.Collections.Generic;
using System.ComponentModel;
using System.Data;
using System.Drawing;
using System.Linq;
using System.Text;
using System.Windows.Forms;
using System.Runtime.InteropServices;
namespace CSharp_ProgramReStart
{
public partial class Form1 : Form
{
#region INI 파일 사용을 위해 API 선언...
[DllImport("KERNEL32.DLL")]
private static extern bool WritePrivateProfileString(string lpAppName, string lpKeyName, string lpString, string lpFileName);
[DllImport("KERNEL32.DLL")]
private static extern uint GetPrivateProfileInt(string lpAppName, string lpKeyName, int nDefault, string lpFileName);
[DllImport("kernel32.dll")]
static extern uint GetPrivateProfileString(string lpAppName, string lpKeyName, string lpDefault, StringBuilder lpReturnedString, int nSize, string lpFileName);
#endregion
string strINIPath = Application.ExecutablePath.Substring(0, Application.ExecutablePath.LastIndexOf('\\')) + "\\INI";
int iCount = 0;
public Form1()
{
InitializeComponent();
}
private void Form1_Load(object sender, EventArgs e)
{
//INI File 만들기...
CreateIni("ReStart");
//INI File Load...
label2.Text = getIni("Restart_Info", "restart", "0", strINIPath + "\\Restart.ini");
iCount = Convert.ToInt32(label2.Text);
}
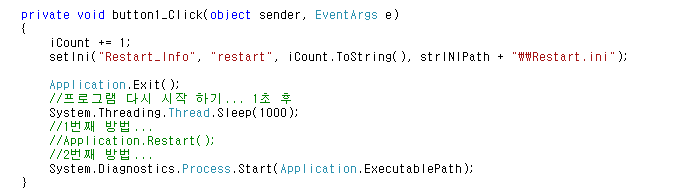
private void button1_Click(object sender, EventArgs e)
{
iCount += 1;
setIni("Restart_Info", "restart", iCount.ToString(), strINIPath + "\\Restart.ini");
Application.Exit();
//프로그램 다시 시작 하기... 1초 후
System.Threading.Thread.Sleep(1000);
//1번째 방법...
//Application.Restart();
//2번째 방법...
System.Diagnostics.Process.Start(Application.ExecutablePath);
}
#region 사용자 정의 함수...
//INIFile 읽어오기...
private string getIni(string IpAppName, string IpKeyName, string lpDefalut, string filePath)
{
string inifile = filePath; //Path + File
try
{
StringBuilder result = new StringBuilder(255);
GetPrivateProfileString(IpAppName, IpKeyName, lpDefalut, result, result.Capacity, inifile);
return result.ToString();
}
catch (Exception ex)
{
Console.WriteLine(ex.ToString());
return "실패";
}
}
//INIFile 쓰기...
private Boolean setIni(string IpAppName, string IpKeyName, string IpValue, string filePath)
{
try
{
string inifile = filePath; //Path + File
WritePrivateProfileString(IpAppName, IpKeyName, IpValue, inifile);
return true;
}
catch (Exception ex)
{
Console.WriteLine(ex.ToString());
return false;
}
}
//INIFile 만들기...
private Boolean CreateIni(string strFileName)
{
try
{
string strCheckFolder = "";
strCheckFolder = Application.ExecutablePath.Substring(0, Application.ExecutablePath.LastIndexOf('\\'));
strCheckFolder += "\\INI";
if (!System.IO.Directory.Exists(strCheckFolder))
{
System.IO.Directory.CreateDirectory(strCheckFolder);
}
strCheckFolder += "\\" + strFileName + ".ini";
if (!System.IO.File.Exists(strCheckFolder))
{
using (System.IO.StreamWriter sw = new System.IO.StreamWriter(strCheckFolder, true, Encoding.GetEncoding(949)))
{
sw.Write("\r\n");
sw.Flush();
sw.Close();
}
}
}
catch (Exception ex)
{
Console.WriteLine(ex.Message.ToString());
return false;
}
return true;
}
#endregion
}
}
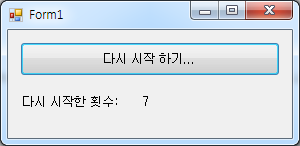
* 예제 결과

https://kdsoft-zeros.tistory.com/31
[C#] INI File Create & Read & Write
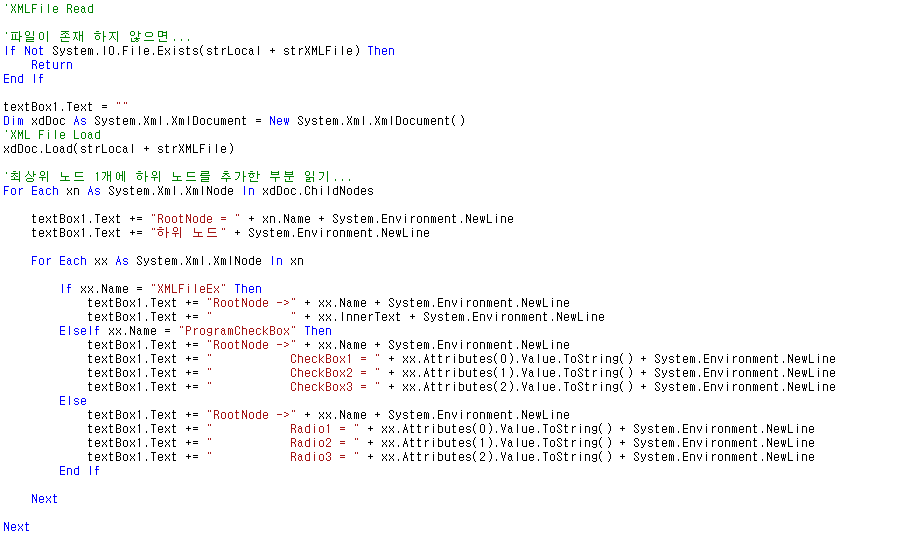
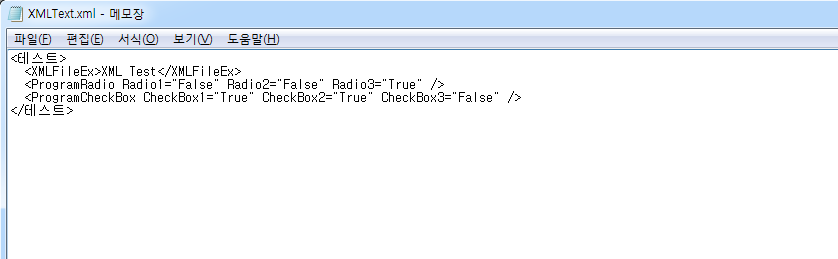
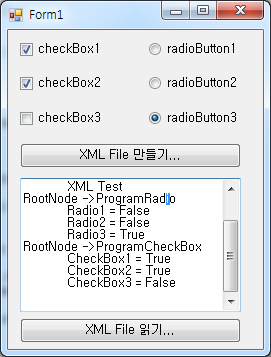
* INI 파일 예제... Form1.cs using System; using System.Collections.Generic; using System.ComponentModel; using System.Data; using System.Drawing; using System.Linq; using System.Text; using System...
kdsoft-zeros.tistory.com
반응형
'C# Programming' 카테고리의 다른 글
| [C#] DateTime 클래스 : 현재 선택된 달의 마지막 날짜 및 요일 구하기 (0) | 2019.11.10 |
|---|---|
| [C#] string 을 int 및 double 형으로 변환 하기, null 체크 (0) | 2019.11.05 |
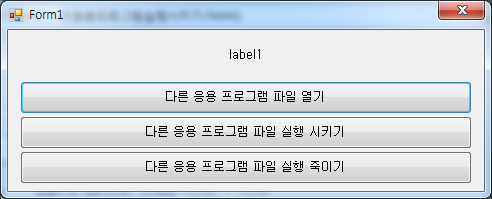
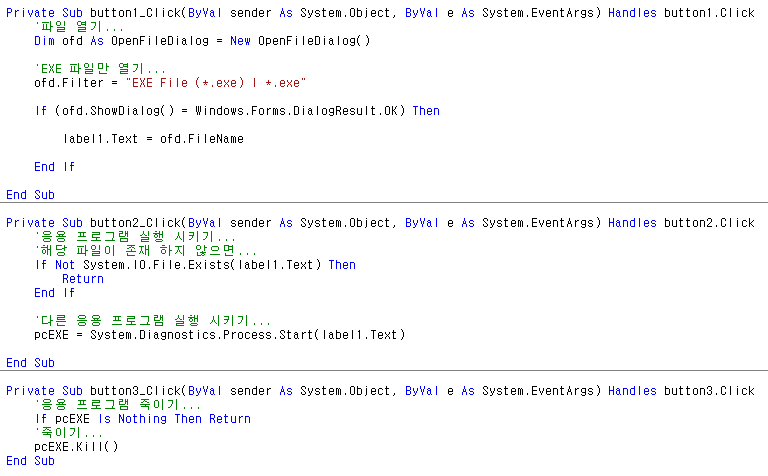
| [C#] 다른 응용 프로그램 실행 및 종료 (0) | 2019.10.28 |
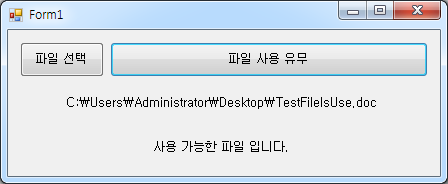
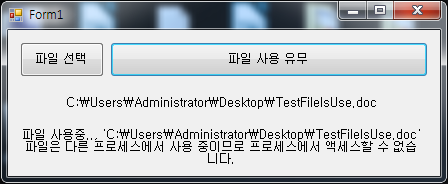
| [C#] File 사용 가능 여부 체크 (0) | 2019.10.25 |
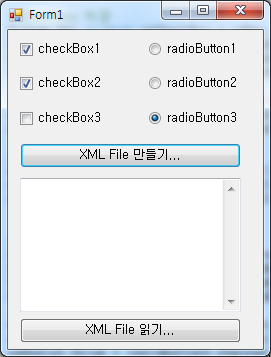
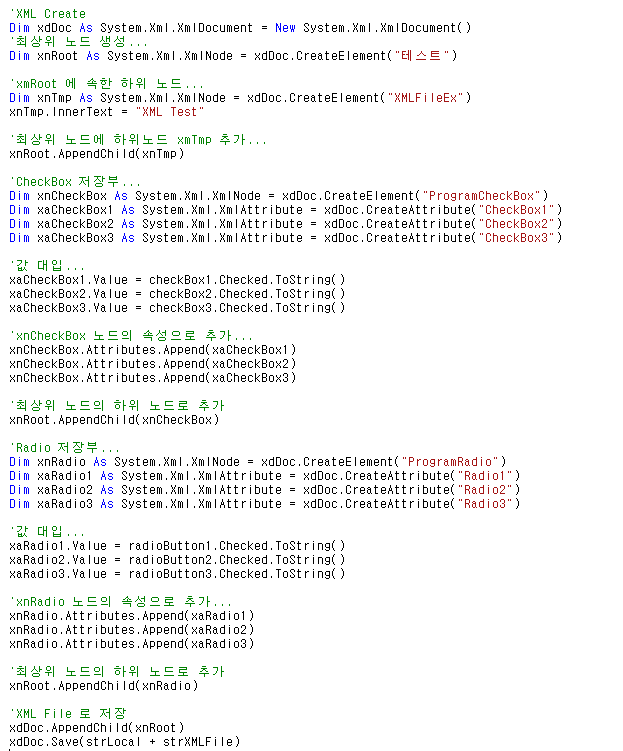
| [C#] XML File Write & Read 예제 (0) | 2019.10.23 |