반응형

* C# 윈도우 폼(Window Form) - Control, Shift, Alt 키 조합 키 입력 받기 (단축키) 예제...


전체 소스 코드

Form1.cs


= 첫번째 방법

using System;
using System.Collections.Generic;
using System.ComponentModel;
using System.Data;
using System.Drawing;
using System.Linq;
using System.Text;
using System.Windows.Forms;

namespace CSharp_FormKey
{
    public partial class Form1 : Form
    {
        public Form1()
        {
            InitializeComponent();
        }

        protected override bool ProcessCmdKey(ref Message msg, Keys keyData)
        {

            Keys key = keyData & ~(Keys.Shift | Keys.Control | Keys.Alt );
            switch (key)
            {
                case Keys.S:
                    {
                        if ((keyData & Keys.Control) != 0)
                        {
                            //Control + S 조합 임
                            MessageBox.Show("Control + S 키를 입력 하였습니다.", "확 인", MessageBoxButtons.OK, MessageBoxIcon.Asterisk);
                        }

                        break;
                    }

                case Keys.F5:
                    {
                        //걍 F5 키 누름
                        MessageBox.Show("F5 키를 입력 하였습니다.", "확 인", MessageBoxButtons.OK, MessageBoxIcon.Asterisk);
                        break;
                    }
                case Keys.Tab:
                    {
                        if ((keyData & Keys.Shift) != 0)
                        {
                            //Shift + Tab 조합 임
                            MessageBox.Show("Shift + Tab 키를 입력 하였습니다.", "확 인", MessageBoxButtons.OK, MessageBoxIcon.Asterisk);

                        }

                        break;
                    }
                case Keys.Enter  :
                    {
                        if ((keyData & Keys.Alt) != 0)
                        {
                            MessageBox.Show("Alt + Enter 키를 입력 하였습니다.", "확 인", MessageBoxButtons.OK, MessageBoxIcon.Asterisk);
                        }
                        break;
                    }
            }


            return base.ProcessCmdKey(ref msg, keyData);
        } 

    }
}


= 두번째 방법

- Form KeyDown 이벤트를 받아서 구현 해 주는 방법 

- Form  속성 -> keyPreview 를 true를 해 줍니다.


private void Form1_KeyDown(object sender, KeyEventArgs e)
        {
            if (e.Modifiers == Keys.Control)
            {
                switch (e.KeyCode)
                {
                    case Keys.S:
                        {
                            //Control + S 조합 임
                            MessageBox.Show("Control + S 키를 입력 하였습니다.", "확 인", MessageBoxButtons.OK, MessageBoxIcon.Asterisk);
                            break;
                        }
                }
            }
            else if (e.Modifiers == Keys.Alt)
            {
                switch (e.KeyCode)
                {
                    case Keys.Enter:
                        {
                            //Alt + Enter 조합 임
                            MessageBox.Show("Alt + Enter 키를 입력 하였습니다.", "확 인", MessageBoxButtons.OK, MessageBoxIcon.Asterisk);
                            break;
                        }
                }
            }
            else
            {
                switch (e.KeyCode)
                {
                    case Keys.F5 :
                        {
                            MessageBox.Show("F5 키를 입력 하였습니다.", "확 인", MessageBoxButtons.OK, MessageBoxIcon.Asterisk);
                            break;
                        }
                }
            }
        }
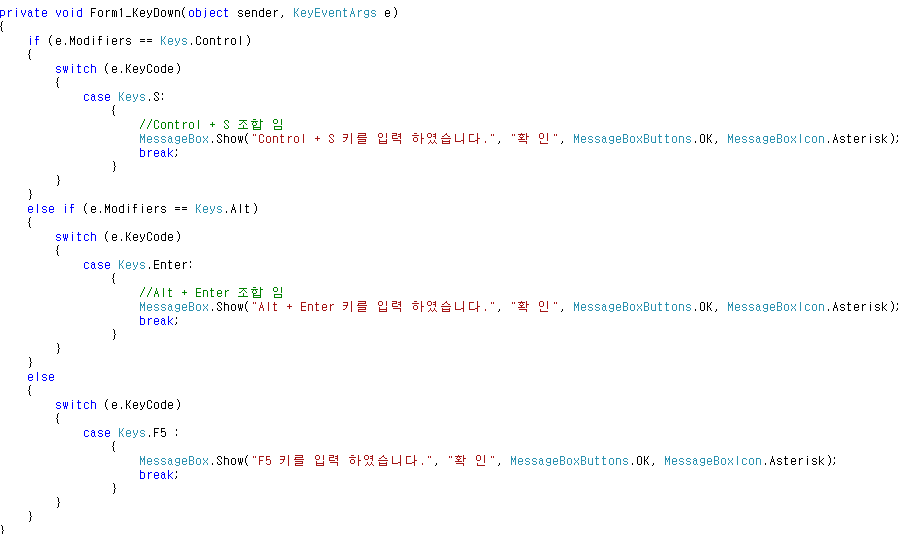
 

*예제 결과


https://kdsoft-zeros.tistory.com/148


[VBNET] 윈도우 폼(Window Form) - Control, Shift, Alt 키 조합 키 입력 받기(단축키)

* VBNET 윈도우 폼(Window Form) - Control, Shift, Alt 키 조합 키 입력 받기 (단축키) 예제... 전체 소스 코드 Form1.vb = 첫번째 방법 - Form KeyDown 이벤트를 받아서 구현 해 주는 방법 - Form 속성 -> keyP..

kdsoft-zeros.tistory.com


반응형
반응형

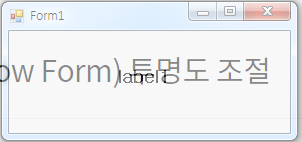
* C# 윈도우 폼(Window Form) 투명도 조절 하기


this.Opacity  = 1 ; // 100%

                    0.5 // 50% 


Opacity = double 형값


반응형
반응형

* C# Network MacAddress 구하기 예제...


전체 소스 코드

Form1.cs


using System;
using System.Collections.Generic;
using System.ComponentModel;
using System.Data;
using System.Drawing;
using System.Linq;
using System.Text;
using System.Windows.Forms;

using System.Net;
using System.Runtime.InteropServices;

namespace CSharp_MacAddress
{
    public partial class Form1 : Form
    {
        [DllImport("iphlpapi.dll", ExactSpelling = true)]
        private static extern int SendARP(int destinationIPValue, int sourceIPValue, byte[] physicalAddressArray, ref uint physicalAddresArrayLength);

        public Form1()
        {
            InitializeComponent();
        }

        private void button1_Click(object sender, EventArgs e)
        {
            string strMacAddress = Get_MACAddress("192.168.0.6");

            MessageBox.Show(strMacAddress);

        }

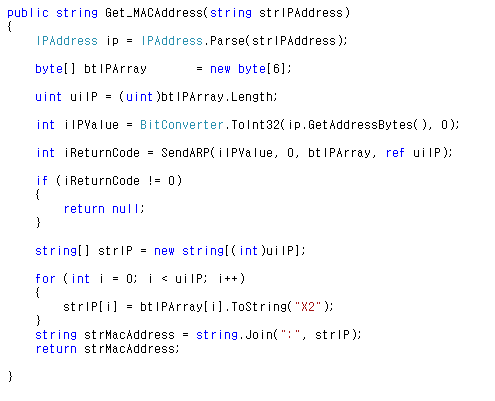
        public string Get_MACAddress(string strIPAddress)
        {
            IPAddress ip = IPAddress.Parse(strIPAddress);
            
            byte[] btIPArray       = new byte[6];
            
            uint uiIP = (uint)btIPArray.Length;
            
            int iIPValue = BitConverter.ToInt32(ip.GetAddressBytes(), 0);
            
            int iReturnCode = SendARP(iIPValue, 0, btIPArray, ref uiIP);

            if (iReturnCode != 0)
            {
                return null;
            }

            string[] strIP = new string[(int)uiIP];

            for (int i = 0; i < uiIP; i++)
            {
                strIP[i] = btIPArray[i].ToString("X2");
            }
            string strMacAddress = string.Join(":", strIP);
            return strMacAddress;

        }

    }
}

*예제 결과 확인 


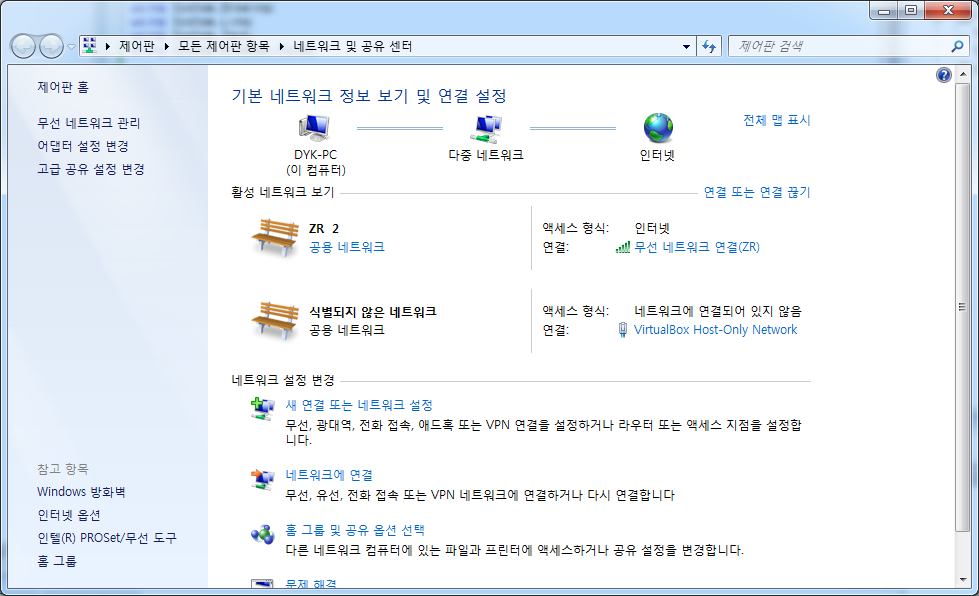
어댑터 설정 변경 - > 해당 어댑터 더블 클릭 - > 자세히 버튼을 클릭 하여 맥주소를 확인 


https://kdsoft-zeros.tistory.com/144


[VBNET] IP MacAddress (IP 맥 주소 구하기)

* VBNET API를 이용한 IP MacAddress (IP 맥 주소 구하기) 예제... 전체 소스 코드 Form1.vb Public Class Form1 Declare Function SendARP Lib "iphlpapi.dll" (ByVal DestIP As UInt32, ByVal SrcIP As UInt32,..

kdsoft-zeros.tistory.com


반응형
반응형

* out 키워드 : 인수를 참조로 전달하는 데 사용.

                   다만 전달 인수가 초기화가 되지 않아도 참조 전달이 됨.

   ref 키워드 : 인수를 참조로 전달하는 데 사용.

                   다만 전달 인수가 반드시 초기화가 되어서 전달 되어야 됨.


위 그림에서 보듯이 ref 참조는 밑줄로 오류가 되어 있습니다. 초기화가 되지 않은 변수가 참조 전달 인수로 되었기 때문입니다. out 참조는 함수 안에서 변수를 초기화 하여 다시 리턴 하는 방식으로 되어 있습니다.


* ref 참조는 반드시 변수가 초기화 되어서 전달 되어야 되지만 out 참조는 변수 초기화 하고 안하고 둘다 참조 전달이 되는 부분이 가장 큰 차이겠습니다. 

반응형
반응형

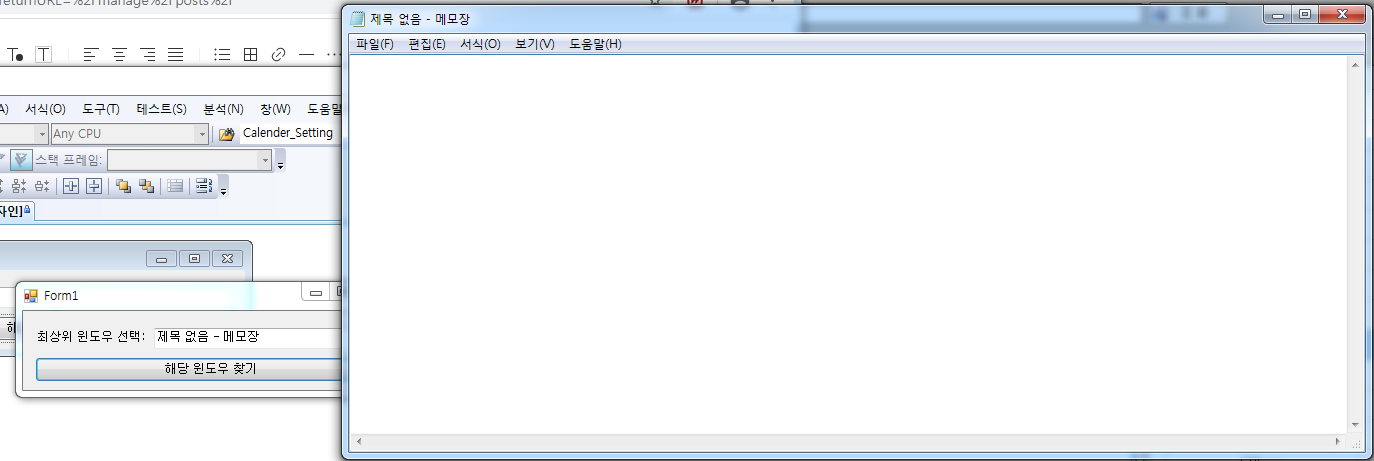
* C# API 를 이용해 해당 윈도우 폼(Window Form) 을 찾아서 최상위 윈도우로 포커스(Focus) 맞추기 예제...


메인 화면

전체 소스 코드

Form1.cs


using System;
using System.Collections.Generic;
using System.ComponentModel;
using System.Data;
using System.Drawing;
using System.Linq;
using System.Text;
using System.Windows.Forms;

using System.Runtime.InteropServices;

namespace CSharp_FirstFocus
{
    public partial class Form1 : Form
    {
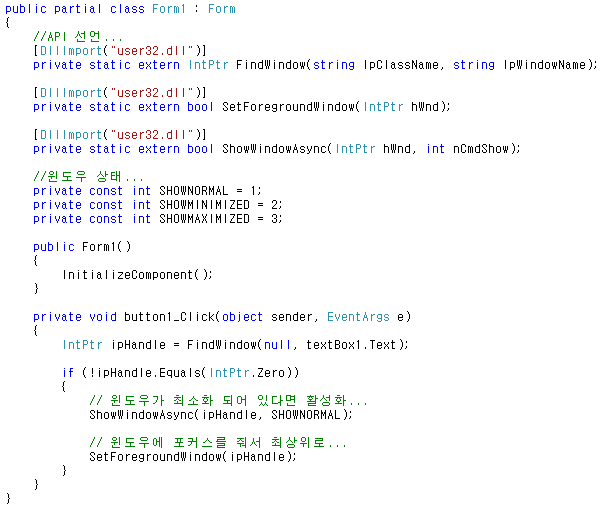
        //API 선언...
        [DllImport("user32.dll")]
        private static extern IntPtr FindWindow(string lpClassName, string lpWindowName);

        [DllImport("user32.dll")]
        private static extern bool SetForegroundWindow(IntPtr hWnd);

        [DllImport("user32.dll")]
        private static extern bool ShowWindowAsync(IntPtr hWnd, int nCmdShow);

        //윈도우 상태...
        private const int SHOWNORMAL = 1;
        private const int SHOWMINIMIZED = 2;
        private const int SHOWMAXIMIZED = 3;

        public Form1()
        {
            InitializeComponent();
        }

        private void button1_Click(object sender, EventArgs e)
        {
            IntPtr ipHandle = FindWindow(null, textBox1.Text);

            if (!ipHandle.Equals(IntPtr.Zero))
            {
                // 윈도우가 최소화 되어 있다면 활성화... 
                ShowWindowAsync(ipHandle, SHOWNORMAL);

                // 윈도우에 포커스를 줘서 최상위로...
                SetForegroundWindow(ipHandle);
            }
        }
    }
}


*예제 결과


결과 화면


https://kdsoft-zeros.tistory.com/107


[C#] [API] 윈도우 창 찾기 (Window Form Search)

* C# API 윈도우 창 이름으로 윈도우 창 찾기 예제... (Window Form Search) 전체 소스 코드 Form1.cs using System; using System.Collections.Generic; using System.ComponentModel; using System.Data; using..

kdsoft-zeros.tistory.com


반응형
반응형

* C# 윈도우 폼 (Window Form) 이 포커스(Focus) 를 가지지 않게 하기 예제...


메인화면

전체 소스 코드

Form1.cs


using System;
using System.Collections.Generic;
using System.ComponentModel;
using System.Data;
using System.Drawing;
using System.Text;
using System.Windows.Forms;


using System.Runtime.InteropServices;

namespace CSharp_FormNoActive
{
    public partial class Form1 : Form
    {
        [DllImport("user32.dll")]
        static extern void keybd_event(byte bVk, byte bScan, uint dwFlags, int dwExtraInfo);

        private const long WM_NOACTIVATE = 0x8000000L;

        public Form1()
        {
            InitializeComponent();
        }

        protected override CreateParams CreateParams
        {
            get
            {
                CreateParams cp = base.CreateParams;
                cp.ExStyle = cp.ExStyle | (int)WM_NOACTIVATE;
                return cp;
            }
        }

        private void button1_Click(object sender, EventArgs e)
        {
            keybd_event((byte)Keys.W, 0, 0, 0);     //KeyDown   이벤트
            keybd_event((byte)Keys.W, 0, 0x02, 0);  //KeyUp     이벤트
        }
    }
}

위 소스와 같이 keybd_event API 함수를 이용해 키보드를 입력한 효과를 나타 낼 수 있습니다.


3번째 전달인자 0 : 키를 눌렀을 때 효과

                0x02 : 키가 올라왔을 때 효과


이므로 두개를 합치면 키를 눌렀다 땠다 하는 효과를 볼 수 있습니다.


*예제 결과


보통 윈도우 폼에서 버튼을 클릭을 하게 되면 마우스 커서 즉 포커스가 윈도우 폼으로 이동 하게 되는데 아래의 그림과 같이 버튼을 클릭 하여도 마우스 커서 즉 포커스가 윈도우 폼으로 이동 되지 않는 다는 것을 볼 수 있습니다. 


반응형
반응형

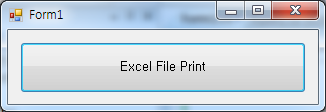
* C# Excel File Print (엑셀 파일 프린트 하기) 예제...


메인화면

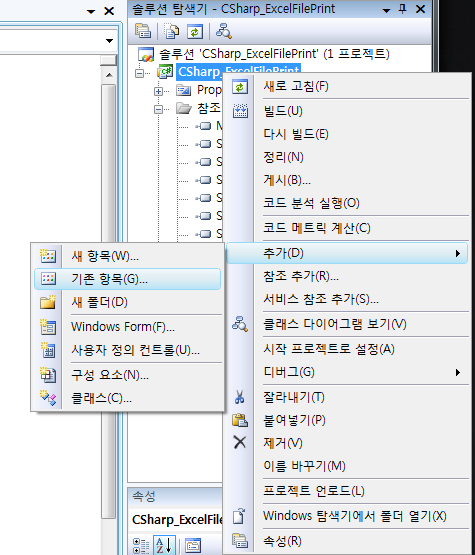
- 인쇄할 엑셀 파일 추가 하기... 

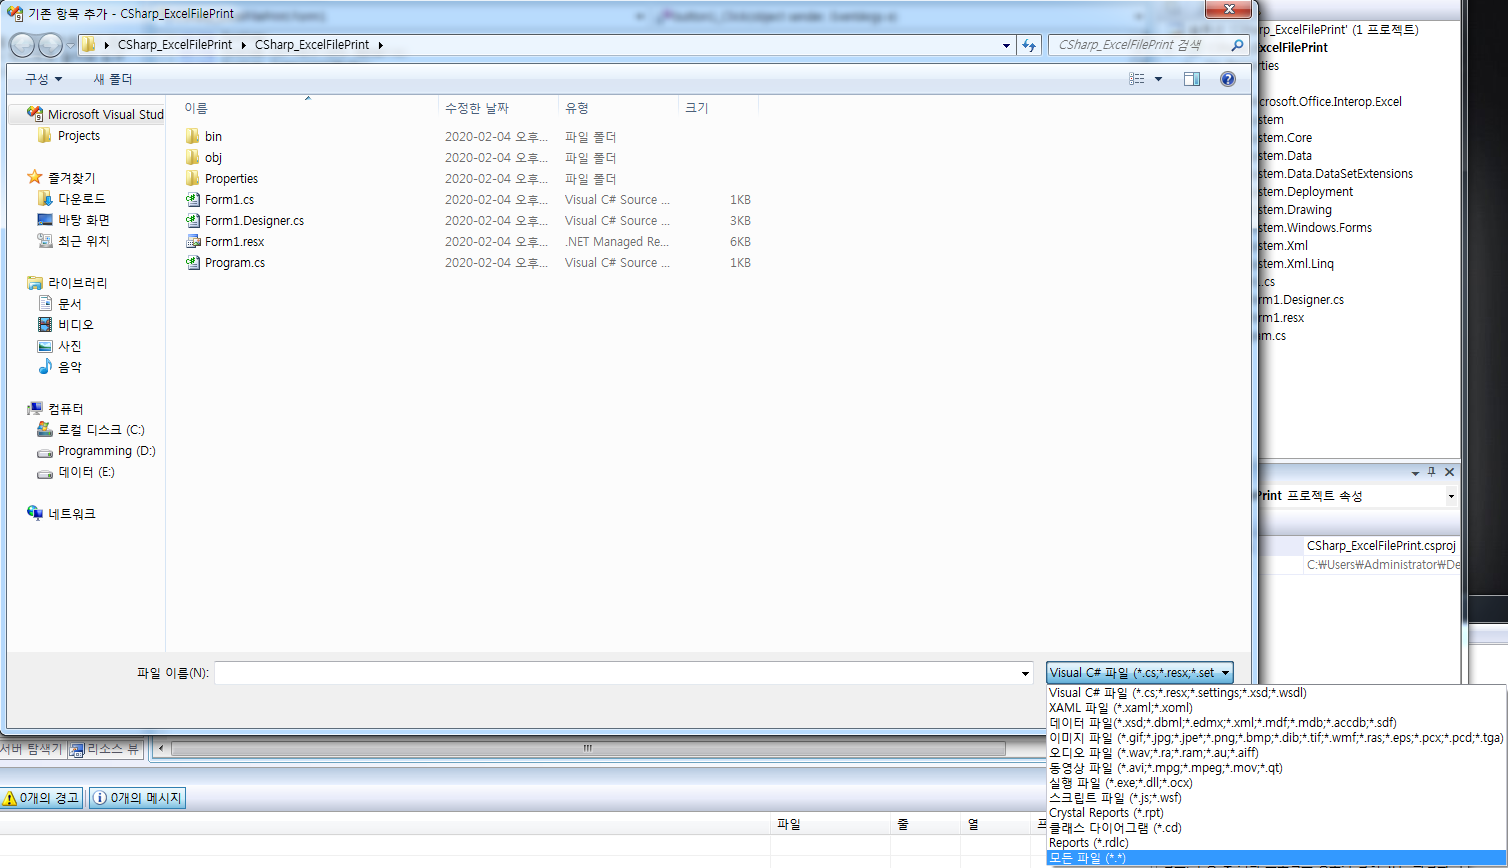
프로젝트 클릭 -> 마우스 오른쪽 클릭 -> 추가 -> 기존 항목 선택


위 그림과 같이 모든 파일 선택 합니다. 기본 Visual C# 파일만 열리게 되어 있는데 모든 파일을 선택 하여 프로젝트에 인쇄할 엑셀 파일을 추가 해 줍니다.


예제를 위해 만들어 둔 엑셀 파일을 프로젝트에 추가 해서 위 그림과 같이 출력 디렉터리로 복사 => 항상 복사

로 두면 빌드 시 Print.xls 파일도 같이 따라 오게 됩니다. 혹 참조에 추가된 DLL 파일 또한 출력 디렉터리로 복사를

항상 복사로 해 두시면 빌드 시 해당 DLL 파일도 같이 EXE 파일이 만들어 지는 곳으로 따라 오게 됩니다.


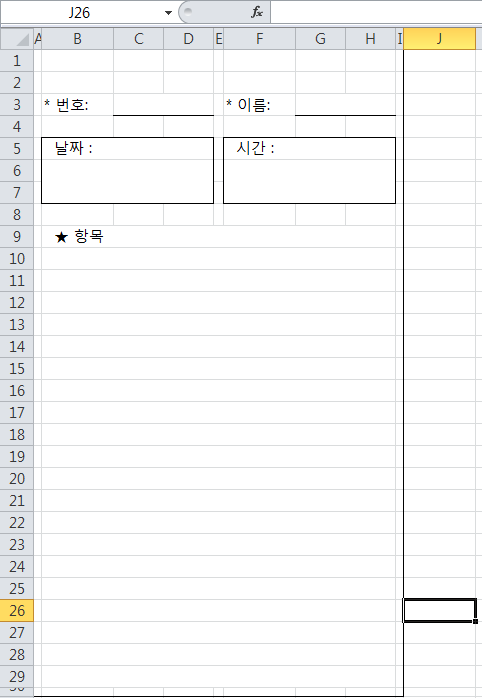
엑셀 파일 내용

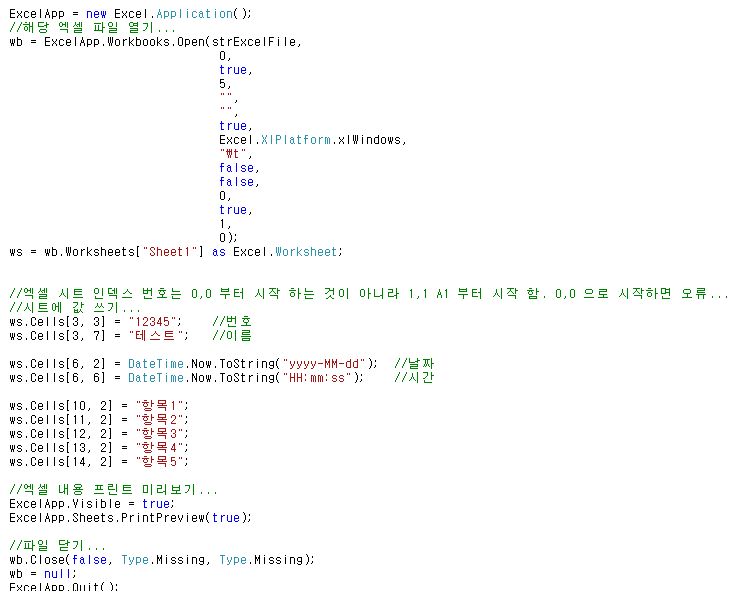
전체 소스 코드

Form1.cs


using System;
using System.Collections.Generic;
using System.ComponentModel;
using System.Data;
using System.Drawing;
using System.Linq;
using System.Text;
using System.Windows.Forms;

using Excel = Microsoft.Office.Interop.Excel;
using System.IO;

namespace CSharp_ExcelFilePrint
{
    public partial class Form1 : Form
    {
        //빌드 후 EXE 파일이 생성 되는 곳
        string strLocalPath =  Application.ExecutablePath.Substring(0, Application.ExecutablePath.LastIndexOf('\\'));

        public Form1()
        {
            InitializeComponent();
        }

        private void button1_Click(object sender, EventArgs e)
        {

            Excel.Application ExcelApp = null;
            Excel.Workbook wb = null;
            Excel.Worksheet ws = null;

            //빌드 후 EXE 파일이 만들어 지는 곳에 있는 Print.xls 엑셀 파일
            string strExcelFile = strLocalPath + "\\Print.xls";

            //파일이 없다면...
            if (!File.Exists(strExcelFile))
            {
                return;
            }

            try
            {

                ExcelApp = new Excel.Application();
                //해당 엑셀 파일 열기...
                wb = ExcelApp.Workbooks.Open(strExcelFile,
                                              0,
                                              true,
                                              5,
                                              "",
                                              "",
                                              true,
                                              Excel.XlPlatform.xlWindows,
                                              "\t",
                                              false,
                                              false,
                                              0,
                                              true,
                                              1,
                                              0);
                ws = wb.Worksheets["Sheet1"] as Excel.Worksheet;


                //엑셀 시트 인덱스 번호는 0,0 부터 시작 하는 것이 아니라 1,1 A1 부터 시작 함. 0,0 으로 시작하면 오류...
                //시트에 값 쓰기...
                ws.Cells[3, 3] = "12345";    //번호
                ws.Cells[3, 7] = "테스트";   //이름

                ws.Cells[6, 2] = DateTime.Now.ToString("yyyy-MM-dd");  //날짜
                ws.Cells[6, 6] = DateTime.Now.ToString("HH:mm:ss");    //시간

                ws.Cells[10, 2] = "항목1";
                ws.Cells[11, 2] = "항목2";
                ws.Cells[12, 2] = "항목3";
                ws.Cells[13, 2] = "항목4";
                ws.Cells[14, 2] = "항목5";

                //엑셀 내용 프린트 미리보기...
                ExcelApp.Visible = true;
                ExcelApp.Sheets.PrintPreview(true);

                //파일 닫기... 
                wb.Close(false, Type.Missing, Type.Missing);
                wb = null;
                ExcelApp.Quit();
            }
            catch (Exception ex)
            {
                //객체들 메모리 해제
                ReleaseExcelObject(ws);
                ReleaseExcelObject(wb);
                ReleaseExcelObject(ExcelApp);
                GC.Collect();
            }
            finally
            {
                //객체들 메모리 해제
                ReleaseExcelObject(ws);
                ReleaseExcelObject(wb);
                ReleaseExcelObject(ExcelApp);
               
                GC.Collect();
            }
        }

        private void ReleaseExcelObject(object obj)
        {
            try
            {
                if (obj != null)
                {
                    System.Runtime.InteropServices.Marshal.ReleaseComObject(obj);
                    obj = null;
                }
            }
            catch (Exception ex)
            {
                obj = null;
                throw ex;
            }
            finally
            {
                GC.Collect();
            }
        }


    }
}


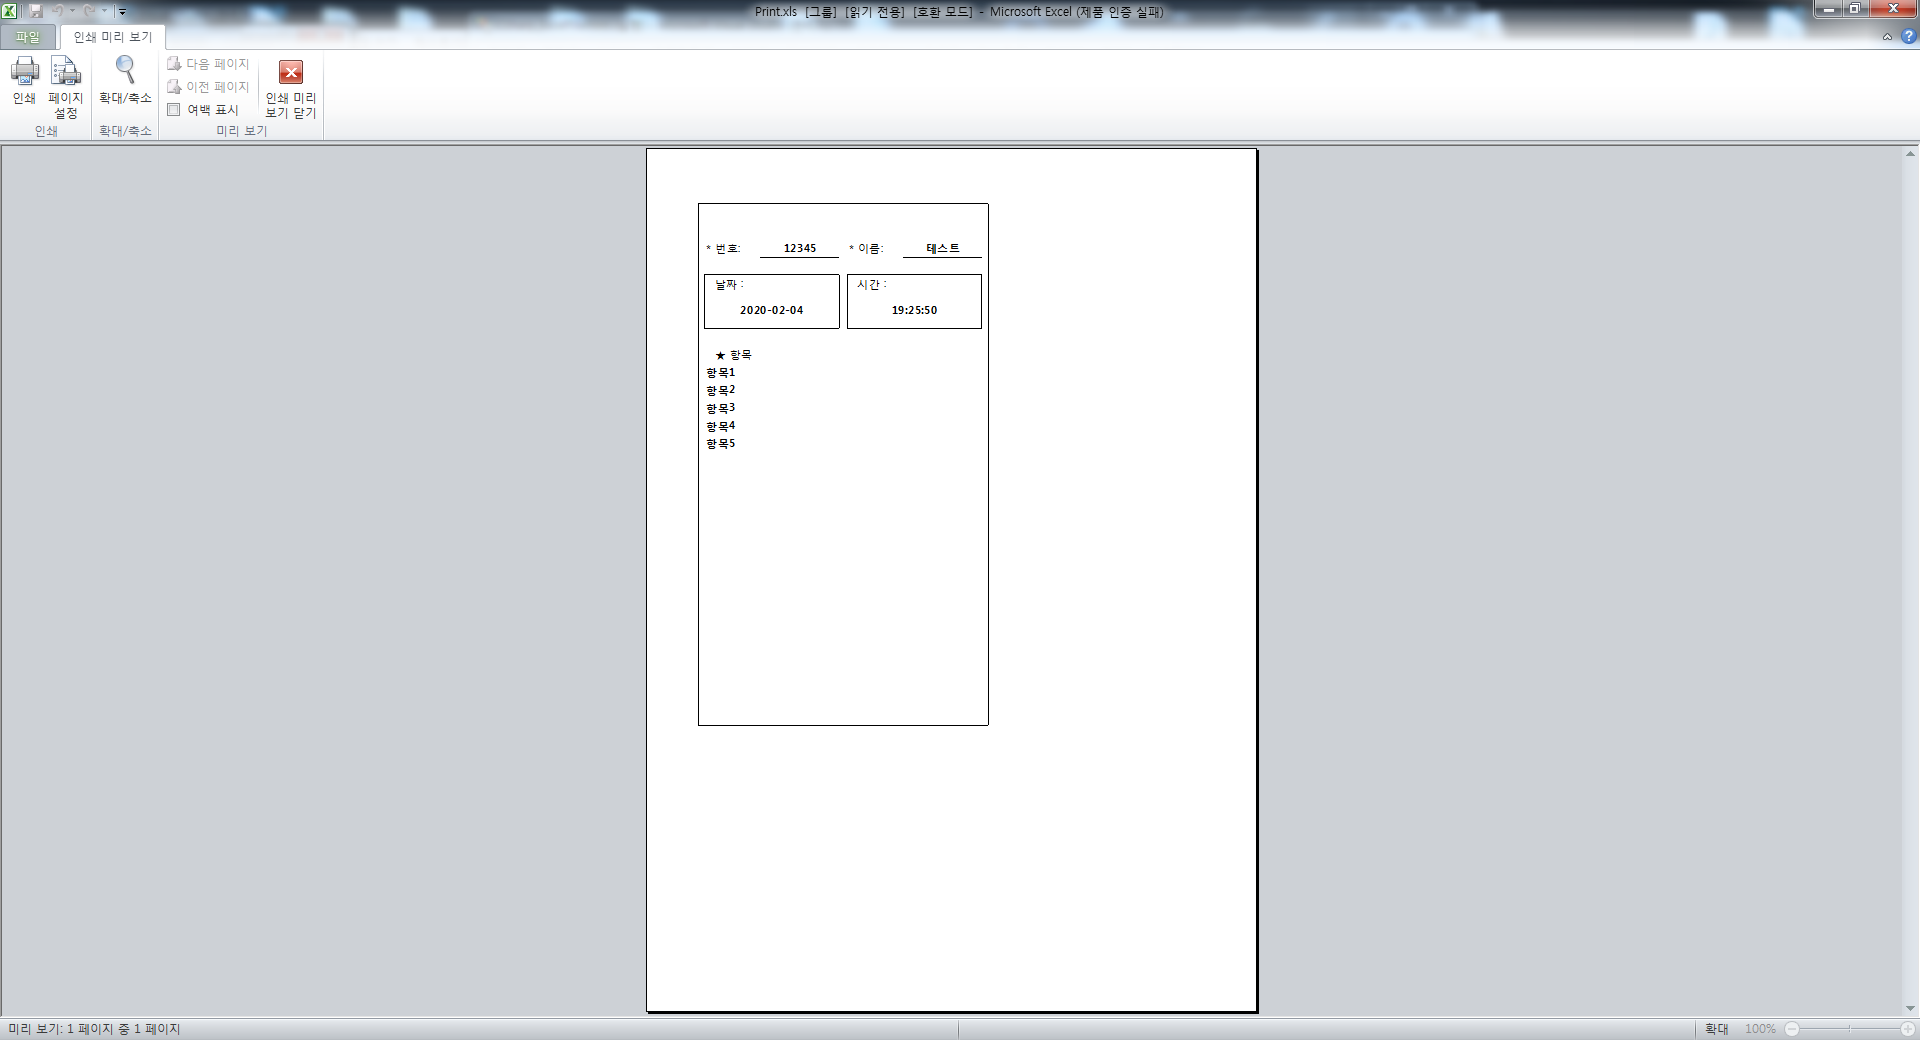
* 예제 실행 결과

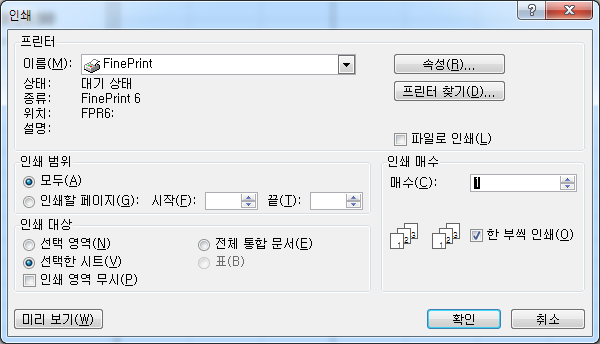
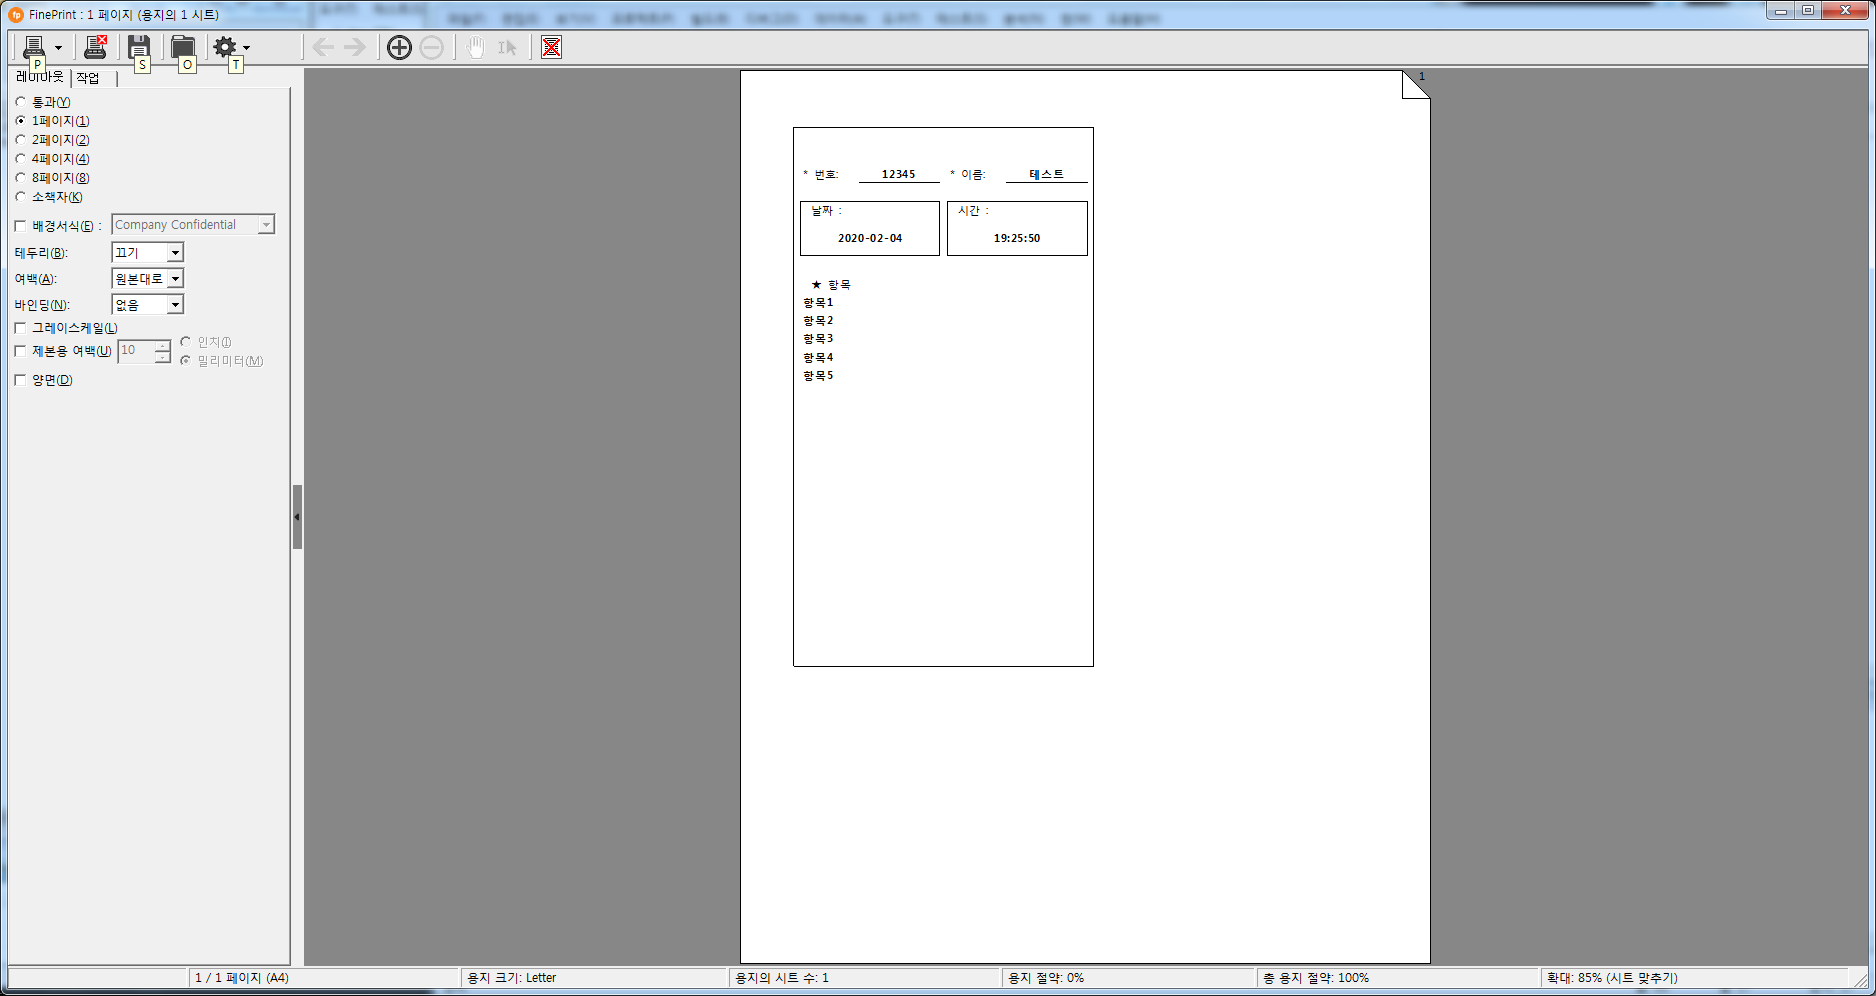
위 그림 처럼 기본 프린터로 연결됨.


Print 내용


https://kdsoft-zeros.tistory.com/35


[C#] Excel File Write & Read 예제...

* 엑셀 파일 쓰고 읽기 예제... 위 그림과 같이 프로젝트에 참조를 추가 해 줍니다. 참조가 추가 되었으면 이제 메인화면을 만들어 봅니다. 소스 구현을 하기에 앞서 미리 엑셀 파일을 열어 D:\통합 문서.xls..

kdsoft-zeros.tistory.com


반응형
반응형

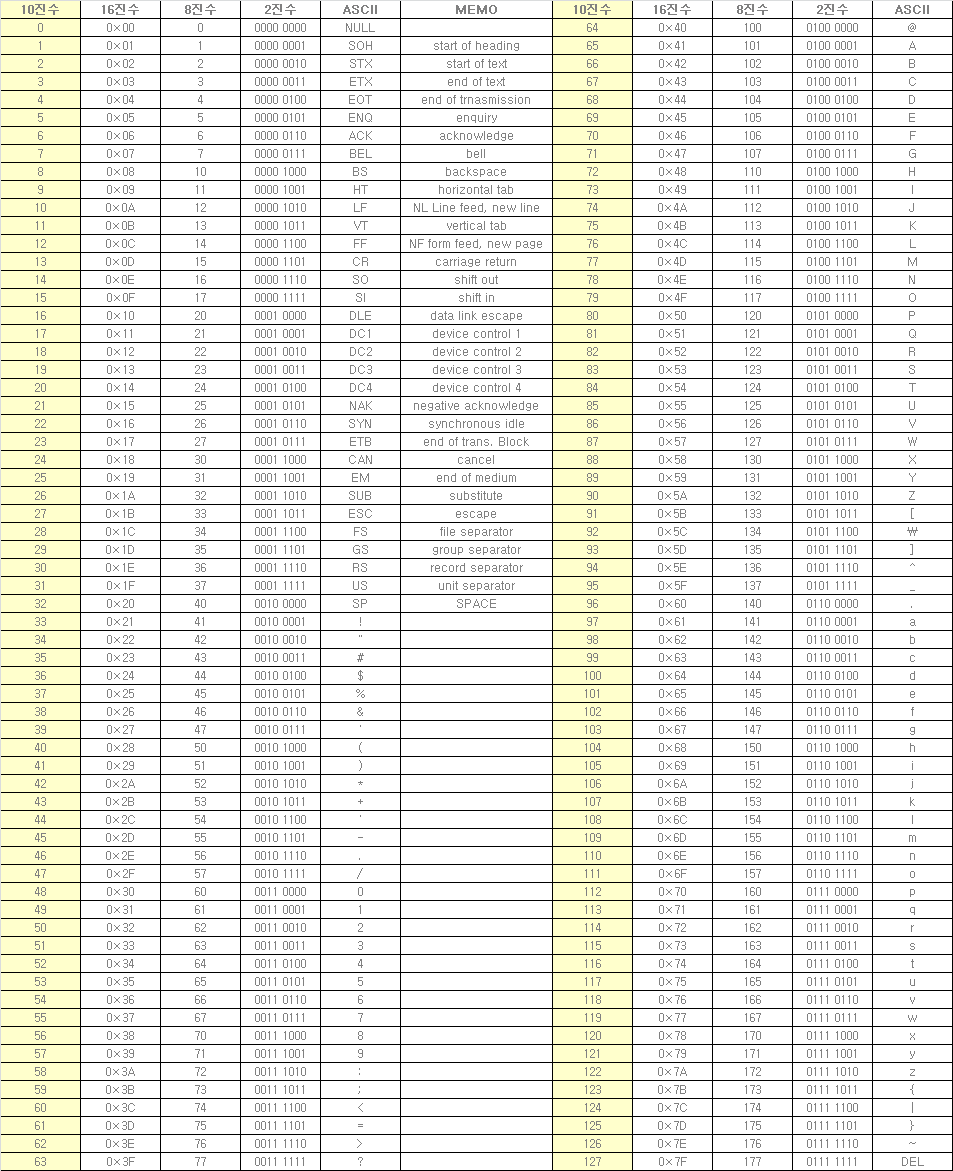
* 아스키 코드 표 (Ascii Code)


반응형

+ Recent posts