반응형
* C# API 를 이용한 화면 캡쳐 방지 (Screen Capture Prevention) 예제...
-사용한 컨트롤 : Button 1개
전체 소스 코드
Form1.cs
using System;
using System.Collections.Generic;
using System.ComponentModel;
using System.Data;
using System.Drawing;
using System.Linq;
using System.Text;
using System.Windows.Forms;

using System.Runtime.InteropServices;

namespace CSharp_화면캡쳐방지
{
    public partial class Form1 : Form
    {
        [DllImport("user32.dll")]
        private static extern uint SetWindowDisplayAffinity(IntPtr windowHandle, uint affinity);
        private const uint ui_NONE = 0;
        private const uint ui_SET = 1;

        public Form1()
        {
            InitializeComponent();
        }

        private void button1_Click(object sender, EventArgs e)
        {
            if (this.button1.Text == "캡처 방지 설정하기")
            {

                SetWindowDisplayAffinity(this.Handle, ui_SET);
                this.button1.Text = "캡처 방지 해제하기";

            }
            else
            {

                SetWindowDisplayAffinity(this.Handle, ui_NONE);
                button1.Text = "캡처 방지 설정하기";

            }
        }
    }
}

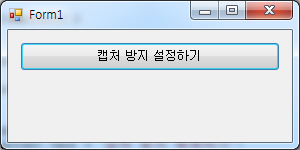
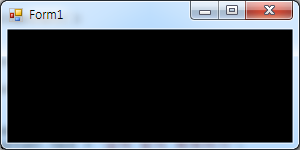
*예제 결과
- 해지 했을 경우
- 설정 했을 경우
반응형
'C# Programming' 카테고리의 다른 글
| [C#] [Control] richTextBox - 문자열 검색 (0) | 2020.08.17 |
|---|---|
| [C#] [Control] Listview - 조회 데이터 CSV 파일로 만들기 (0) | 2020.05.27 |
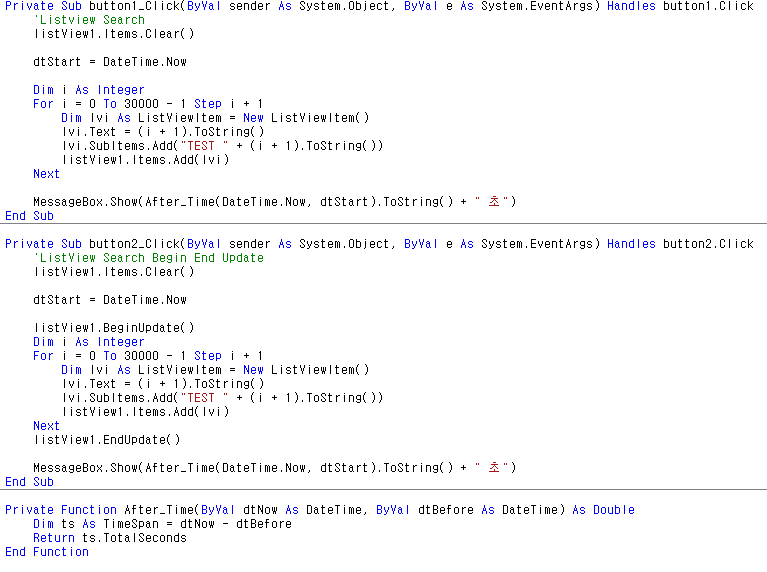
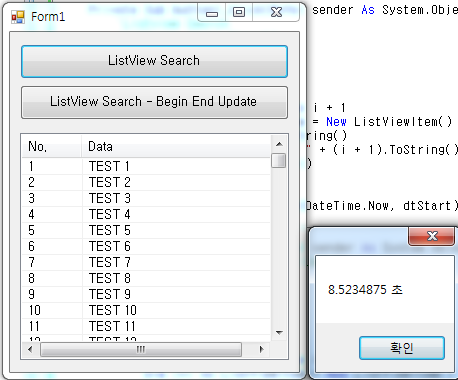
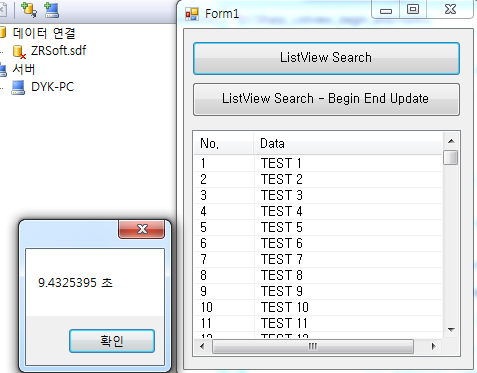
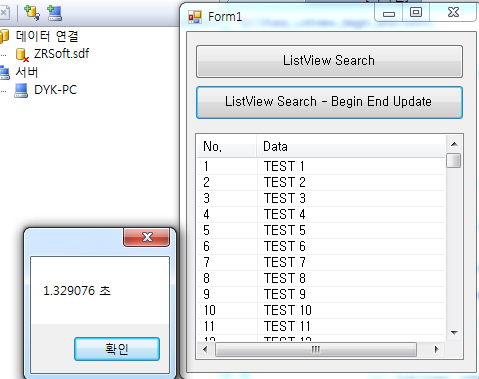
| [C#] [Control] Listview - BeginUpdate(), EndUpdate() 조회 속도 비교 (0) | 2020.05.21 |
| [C#] 움직이는 라벨 만들기 (0) | 2020.05.19 |
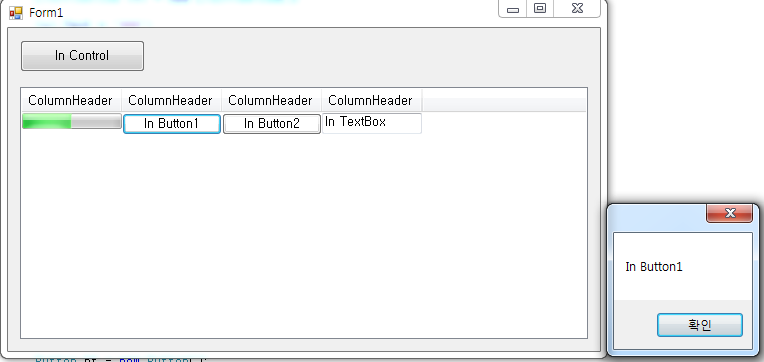
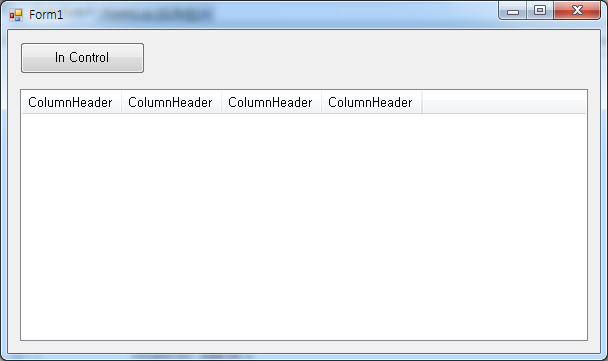
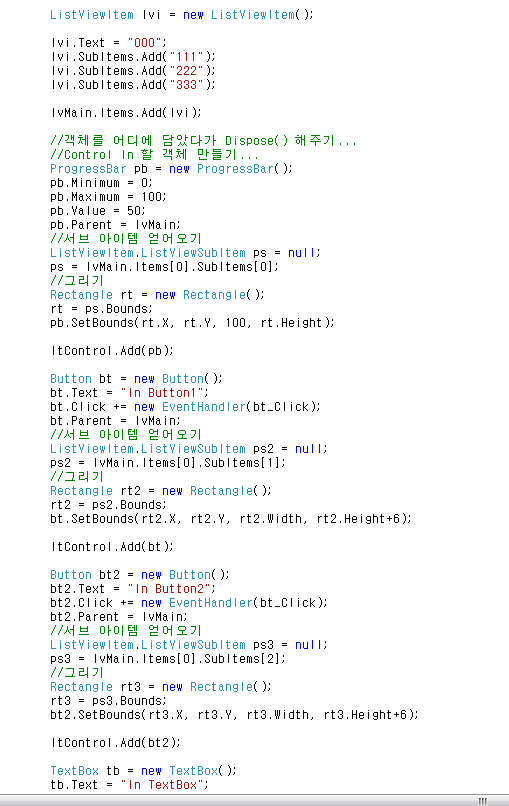
| [C#] [Control] Listview - Button, Progressbar, TextBox 컨트롤 삽입 (0) | 2020.05.15 |