반응형

* INI 파일 예제...


예제 메인화면


Form1.cs


using System;
using System.Collections.Generic;
using System.ComponentModel;
using System.Data;
using System.Drawing;
using System.Linq;
using System.Text;
using System.Windows.Forms;

using System.Runtime.InteropServices;


namespace CSharp_INIFile
{
    public partial class Form1 : Form
    {
        #region INI 파일 사용을 위해 API 선언...

        [DllImport("KERNEL32.DLL")]
        private static extern bool WritePrivateProfileString(string lpAppName, string lpKeyName, string lpString, string lpFileName);

        [DllImport("KERNEL32.DLL")]
        private static extern uint GetPrivateProfileInt(string lpAppName, string lpKeyName, int nDefault, string lpFileName);

        [DllImport("kernel32.dll")]
        static extern uint GetPrivateProfileString(string lpAppName, string lpKeyName, string lpDefault, StringBuilder lpReturnedString, int nSize, string lpFileName);

        #endregion

        #region 정의 함수...
        //INIFile 읽어오기...
        private string getIni(string IpAppName, string IpKeyName, string lpDefalut, string filePath)
        {
            string inifile = filePath;    //Path + File

            try
            {
                StringBuilder result = new StringBuilder(255);
                GetPrivateProfileString(IpAppName, IpKeyName, lpDefalut, result, result.Capacity , inifile);

                return result.ToString();
            }
            catch (Exception ex)
            {
                Console.WriteLine(ex.ToString());
                return "실패";
            }
        }

        //INIFile 쓰기...
        private Boolean setIni(string IpAppName, string IpKeyName, string IpValue, string filePath)
        {
            try
            {
                string inifile = filePath;  //Path + File
                WritePrivateProfileString(IpAppName, IpKeyName, IpValue, inifile);
                return true;
            }
            catch (Exception ex)
            {
                Console.WriteLine(ex.ToString());
                return false;
            }
        }

        //INIFile 만들기...
        private Boolean CreateIni(string strFileName)
        {
            try
            {
                string strCheckFolder = "";

                strCheckFolder = Application.ExecutablePath.Substring(0, Application.ExecutablePath.LastIndexOf('\\'));
                strCheckFolder += "\\INI";
                if (!System.IO.Directory.Exists(strCheckFolder))
                {
                    System.IO.Directory.CreateDirectory(strCheckFolder);

                }

                strCheckFolder += "\\" + strFileName + ".ini";
                if (!System.IO.File.Exists(strCheckFolder))
                {
                    using (System.IO.StreamWriter sw = new System.IO.StreamWriter(strCheckFolder, true, Encoding.GetEncoding(949)))
                    {
                        sw.Write("\r\n");
                        sw.Flush();
                        sw.Close();
                    }

                }

            }
            catch (Exception ex)
            {
                Console.WriteLine(ex.Message.ToString());
                return false;
            }
            return true;
        }


        #endregion

        string strCheckFolder = Application.ExecutablePath.Substring(0, Application.ExecutablePath.LastIndexOf('\\'));

        public Form1()
        {
            InitializeComponent();

            strCheckFolder += "\\INI";
        }

        private void button1_Click(object sender, EventArgs e)
        {
            //만들기...
            if (CreateIni("Test"))
            {
                label1.Text = "INIFile Create Complete.";
                label2.Text = "FileName: Test.ini";
            }
        }

        private void button2_Click(object sender, EventArgs e)
        {
            //읽기...
            label4.Text = "INIFile Read Complete.";
            label3.Text = getIni("Test_Info", "Test", "", strCheckFolder + "\\Test.ini");

        }

        private void button3_Click(object sender, EventArgs e)
        {
            //쓰기...
            if (setIni("Test_Info", "Test", "1231231231", strCheckFolder + "\\Test.ini"))
            {
                label6.Text = "INIFile Write Complete.";
                label5.Text = "Value: 1231231231";
            }
        }
    }


}


위 예제는 윈도우 API 함수를 이용해 INI 파일을 읽고 쓰기를 해 보았습니다. INI 파일 삭제는

if ( File.Exits("파일위치")) File.Delete("파일위치") ; 파일 삭제랑 똑같기 때문에 따로 넣진 않았습니다.


* 예제 결과


결과 화면

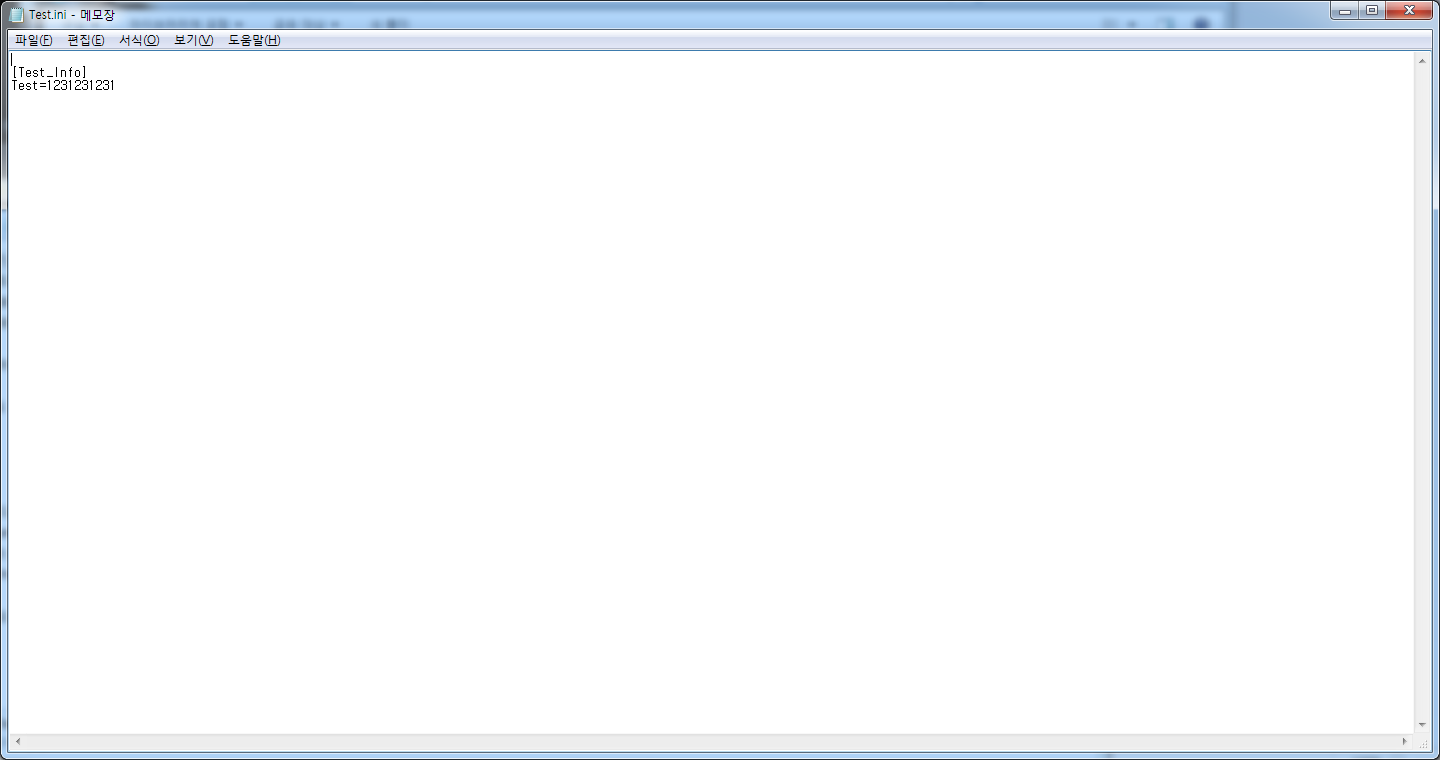
위 사진은 INI 파일 내용 으로 INI File Read 시 어떤 내용을 읽어 오는지를 참조 하기 위해...

반응형
반응형

* 윈도우 레지스트리에 읽고 쓰고 만들고 지우기 예제

레지스트리 메인화면

Form1.cs


using System;
using System.Collections.Generic;
using System.ComponentModel;
using System.Data;
using System.Drawing;
using System.Text;
using System.Windows.Forms;

using Microsoft.Win32;

namespace CSharp_Resistry
{
    public partial class Form1 : Form
    {
        string strTmp = "SOFTWARE\\"; //레지스트리 최상위 폴더 지정
        string strAppName = "RegistryTest";


        public Form1()
        {
            InitializeComponent();

            //쓰기
            WriteReg(strAppName, "Test1", "iii", "asdfasdf000");
            WriteReg(strAppName, "Test2", "iii", "asdfasdf111");
            WriteReg(strAppName, "Test3", "iii", "asdfasdf222");
            WriteReg(strAppName, "Test4", "iii", "asdfasdf333");

            //읽기
            //MessageBox.Show(ReadReg(strAppName,"Test1","iii"));

            //삭제
            //DeleteReg(strAppName);


            //등록된 목록 읽기
            RegistryKey rk = Registry.CurrentUser.OpenSubKey(strTmp + strAppName);
            string[] str = rk.GetSubKeyNames();

            for (int iCount = 0; iCount < str.Length; iCount++)
            {
                lbList.Items.Add(str[iCount]);
            }


        }

        //레지스트리도 폴더 개념으로 접근...
        #region Registry Create & Read & Write & Delete...
        
        private bool DeleteReg(string strSubKey)
        {
            RegistryKey rk = Registry.CurrentUser.OpenSubKey(strTmp, true);
            try
            {
                //하위 폴더(레지스트리)가 있으면 삭제 안됨.
                //if(rk !=null) rkDeleteSubKey(strSubKey);

                //하위 폴더(레지스트리) 가 있던 없던 걍 삭제...
                if (rk != null) rk.DeleteSubKeyTree(strSubKey);
            }
            catch (Exception ex)
            {
                return false;
            }
            return true;
        }

        //레지스트리 쓰기
        private   bool WriteReg(string strAppName,
                                    string strSubKey,
                                    string strKey,
                                    string strValue)
        {

            RegistryKey rkReg = Registry.CurrentUser.OpenSubKey(strTmp + strAppName, true);
            //null 이면 폴더(레지스트리)가 없으므로 만듬...
            if (rkReg == null) rkReg = Registry.CurrentUser.CreateSubKey(strTmp  + strAppName);
            
            //OpenSubKey (하위폴더(레지스트리 이름) , 쓰기 선택 True 쓰기 False 및 인자가 없다면 읽기)
            RegistryKey rkSub = Registry.CurrentUser.OpenSubKey(strTmp + strAppName + "\\" + strSubKey, true);
            if (rkSub == null) rkSub = Registry.CurrentUser.CreateSubKey(strTmp + strAppName + "\\" + strSubKey);

            try
            {
                rkSub.SetValue(strKey, strValue);
            }
            catch (Exception ex)
            {
                Console.WriteLine(ex.Message.ToString());
                return false;
            }
            return true;
        }
        //레지스트리 읽기
        private string ReadReg(string strAppName,
                                    string strSubKey,
                                    string strKey)
        {
            RegistryKey reg;
           
            try
            {
                reg = Registry.CurrentUser.OpenSubKey(strTmp + strAppName ).OpenSubKey(strSubKey);
            }
            catch (Exception ex)
            {
                return "";
            }
          
            return reg.GetValue(strKey, "").ToString();
        }

        #endregion

    }
}


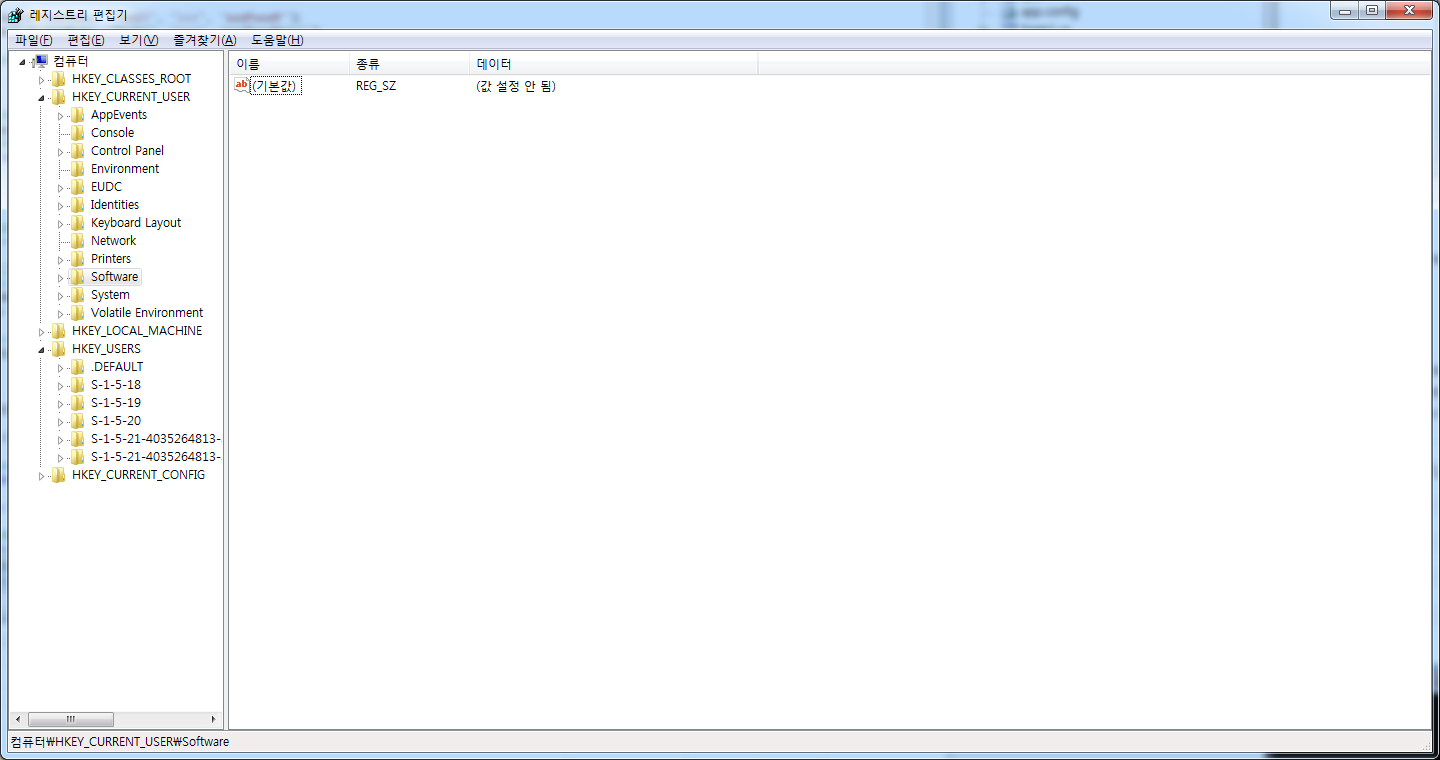
아래의 그림을 보면 

HKEY_CUREENT_USER 가 트리뷰에서 보이게 됩니다.

Registry.CurrentUser 는 저 레지스트리 폴더를 가르키게 되며

Registry.LocalMachine는 그 아래에 있는 HKEY_LOCAL_MACHINE 으로 들어가게 됩니다.


위 소스 Registry.CurrentUer.OpenSubKey("SOFTWARE") 는

레지스트리에 HKEY_CURRENT_USER => Software 폴더를 열겠다는 뜻


*레지스트리 편집기 (시작 -> 실행 -> regedit)


레지스트리 편집기 실행 
레지스트리 프로그램 실행 후 편집기 실행


반응형
반응형

* C# 소스코드를 동적으로 컴파일 하는 예제


기본 메인화면

Form1.cs


using System;
using System.Collections.Generic;
using System.ComponentModel;
using System.Data;
using System.Drawing;
using System.Text;
using System.Windows.Forms;

using System.CodeDom.Compiler;
using System.Runtime.InteropServices;

namespace CSharp_동적컴파일
{
    public partial class Form1 : Form
    {
        //API 선언 (다른 프로그램 실행 시키키 위한 변수)
        [DllImport("Shell32.dll", CharSet = CharSet.Auto, SetLastError = true)]
        static extern IntPtr ShellExecute(IntPtr hwnd, string lpOperation, string lpFile, string lpParameters, string lpDirectory, int nShowCmd);

        public Form1()
        {
            InitializeComponent();

            textBox1.Text = @"using System;

                                namespace Zmeun.CodeDom
                                {
                                    class CodeDomTest
                                    {
                                        static void Main(string[] args)
                                        {
                                            System.Console.WriteLine(""Hello World!"");
                                            System.Console.WriteLine(""Press the Enter key to continue."");
                                            System.Console.ReadLine();
                                        }
                                    }
                                }";
        }

        private void button1_Click(object sender, EventArgs e)
        {
            CodeDomProvider codeDomProvider = CodeDomProvider.CreateProvider("c#");
            CompilerParameters compilerParameters = new CompilerParameters();

            //.GenerateExecutable 이값을 'false'로 하면 dll로 출력됨
            compilerParameters.GenerateExecutable = true;
            //컴파일 된 EXE 파일 출력 Path
            compilerParameters.OutputAssembly = @"c:\test.exe";
            CompilerResults compilerResults = codeDomProvider.CompileAssemblyFromSource(compilerParameters, textBox1.Text );

            if (compilerResults.Errors.Count > 0)
            {
                textBox1.Text = compilerResults.Errors[0].ToString();
            }
            else
            {
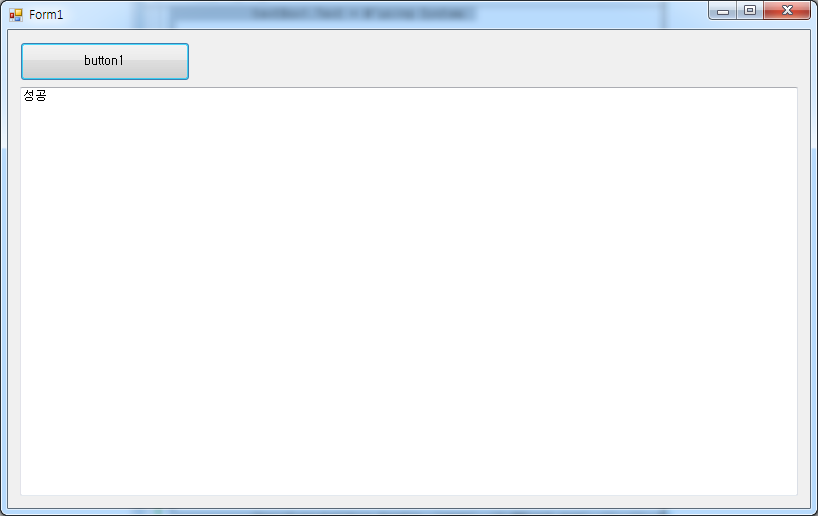
                textBox1.Text = "성공";
            }
            
            //컴파일된 프로그램 실행 시키기...
            ShellExecute(this.Handle, "open", "C:\\test.exe", "", "", 4);

        }
    }
}


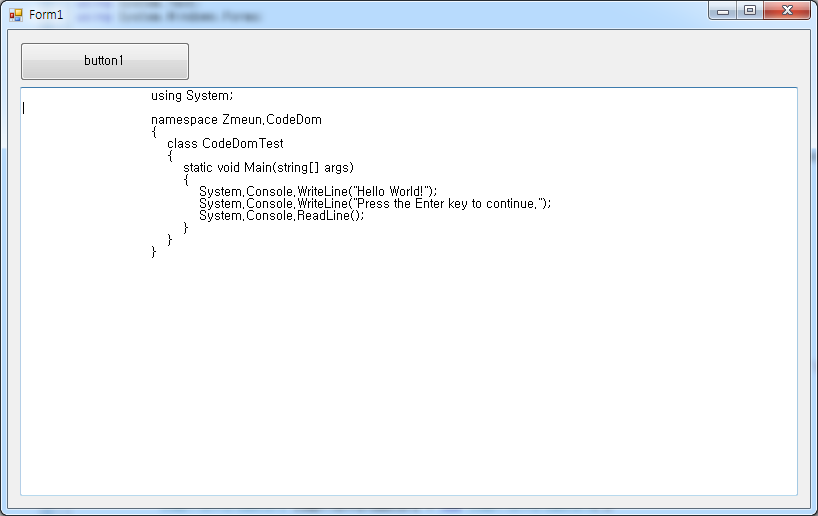
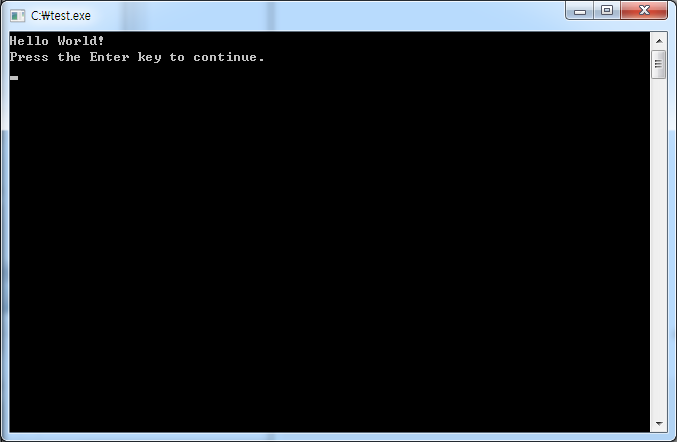
실행 결과


반응형
반응형

* 객체 직렬화 (Serialization)

 - 객체를 메모리나 파일 , 데이터베이스에 저장할 때 쓰이는 방식


* 예제


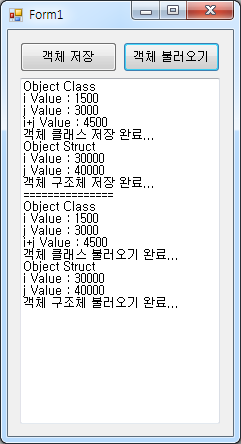
메인화면

Form1.cs


using System;
using System.Collections.Generic;
using System.ComponentModel;
using System.Data;
using System.Drawing;
using System.Linq;
using System.Text;
using System.Windows.Forms;

namespace ObjectSerialization_File
{

    public partial class Form1 : Form
    {
        //객체 저장을 위한 변수 선언...
        ObjectClass oc = new ObjectClass();
        ObjectStruct os = new ObjectStruct();

        public Form1()
        {
            InitializeComponent();
        }

        private void button1_Click(object sender, EventArgs e)
        {
            //저장

            //객체 클래스 변수 값 변경...
            oc.FniValue = 1500;
            oc.FnjVlaue = 3000;

            using (System.IO.Stream stm = System.IO.File.Open("ect.dat", System.IO.FileMode.Create , System.IO.FileAccess.ReadWrite  ))
            {
                System.Runtime.Serialization.Formatters.Binary.BinaryFormatter bf = new System.Runtime.Serialization.Formatters.Binary.BinaryFormatter();
                //객체 직렬화 저장
                bf.Serialize(stm, oc);
                stm.Close();
            }

            textBox1.Text += "Object Class" + System.Environment.NewLine;
            textBox1.Text += "i Value : " + oc.FniValue.ToString() + System.Environment.NewLine;
            textBox1.Text += "j Value : " + oc.FnjVlaue.ToString() + System.Environment.NewLine;
            textBox1.Text += "i+j Value : " + oc.GetValue().ToString() + System.Environment.NewLine;
            textBox1.Text += "객체 클래스 저장 완료..." + System.Environment.NewLine;

            //객체 구조체 변수 값 변경...
            os.i = 30000;
            os.j = 40000;

            using (System.IO.Stream stm = System.IO.File.Open("ect2.dat", System.IO.FileMode.Create, System.IO.FileAccess.ReadWrite))
            {
                System.Runtime.Serialization.Formatters.Binary.BinaryFormatter bf = new System.Runtime.Serialization.Formatters.Binary.BinaryFormatter();
                //객체 직렬화 저장
                bf.Serialize(stm, os);
                stm.Close();
            }
            textBox1.Text += "Object Struct" + System.Environment.NewLine;
            textBox1.Text += "i Value : " + os.i .ToString() + System.Environment.NewLine;
            textBox1.Text += "j Value : " + os.j.ToString() + System.Environment.NewLine;
            textBox1.Text += "객체 구조체 저장 완료..." + System.Environment.NewLine;

            textBox1.Text += "===============" + System.Environment.NewLine;

        }

        private void button2_Click(object sender, EventArgs e)
        {
            ObjectClass LoadOC;
            ObjectStruct LoadOS;

            //불러오기
            using (System.IO.Stream stm = System.IO.File.Open("ect.dat", System.IO.FileMode.Open, System.IO.FileAccess.Read))
            {
                System.Runtime.Serialization.Formatters.Binary.BinaryFormatter bf = new System.Runtime.Serialization.Formatters.Binary.BinaryFormatter();
                //직렬화 된 객체 역직렬화 및 다시 객체 클래스로 형변환
                LoadOC = (ObjectClass) bf.Deserialize(stm);
                stm.Close();
            }

            textBox1.Text += "Object Class" + System.Environment.NewLine;
            textBox1.Text += "i Value : " + LoadOC.FniValue.ToString() + System.Environment.NewLine;
            textBox1.Text += "j Value : " + LoadOC.FnjVlaue.ToString() + System.Environment.NewLine;
            textBox1.Text += "i+j Value : " + LoadOC.GetValue().ToString() + System.Environment.NewLine;
            textBox1.Text += "객체 클래스 불러오기 완료..." + System.Environment.NewLine;

            using (System.IO.Stream stm = System.IO.File.Open("ect2.dat", System.IO.FileMode.Open, System.IO.FileAccess.Read))
            {
                System.Runtime.Serialization.Formatters.Binary.BinaryFormatter bf = new System.Runtime.Serialization.Formatters.Binary.BinaryFormatter();
                //직렬화 된 객체 역직렬화 및 다시 구조체로 형변환
                LoadOS  = (ObjectStruct) bf.Deserialize(stm)  ;
                stm.Close();
            }

            textBox1.Text += "Object Struct" + System.Environment.NewLine;
            textBox1.Text += "i Value : " + LoadOS.i.ToString() + System.Environment.NewLine;
            textBox1.Text += "j Value : " + LoadOS.j.ToString() + System.Environment.NewLine;
            textBox1.Text += "객체 구조체 불러오기 완료..." + System.Environment.NewLine;
        }
    }

    //객체 직렬화를 위한 클래스 선언...
    [Serializable]
    public class ObjectClass
    {
        int i = 300;
        int j = 100;

        public int FniValue
        {
            get { return i;}
            set { i = value;}
        }

        public int FnjVlaue
        {
            get { return j; }
            set { j = value; }
        }


        public int GetValue()
        {
            return i + j;
        }
    }

    //객체 직렬화를 위한 구조체 선언...
    [Serializable]
    public struct ObjectStruct
    {
        public int i;
        public int j;
    }
}

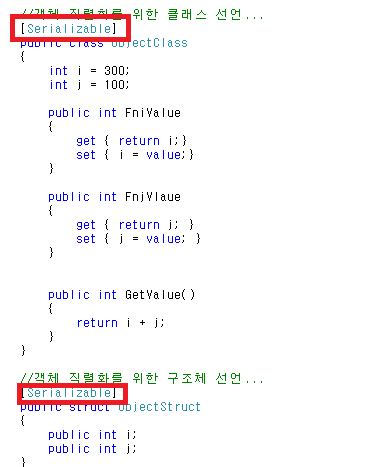
* 객체 직렬화를 위해서는 그 선언 객체에 반드시 [Serializable] 을 붙여 줘야 됨.


반응형
반응형

* 구조체를 Marshal 이용 바이트배열로 변환 하거나 바이트 배열화 된 구조체를 다시 원래 모습으로

   복귀 시키는 예제...


메인화면

Form1.cs


using System;
using System.Collections.Generic;
using System.ComponentModel;
using System.Data;
using System.Drawing;
using System.Linq;
using System.Text;
using System.Windows.Forms;

using System.Runtime.InteropServices;

namespace StructAndBytes
{
    public partial class Form1 : Form
    {
        //구조체 선언...
        struct t_Test
        {
            public int iTmp ;
            public string strTmp;
            public double dbTmp ;
            public float ftTmp ;
        }

        //구조체 변수 선언...
        t_Test tt = new t_Test();

        byte[] bTmp;


        public Form1()
        {
            InitializeComponent();

            //테스트 값 대입...
            tt.dbTmp = 0.12321312313;
            tt.iTmp = 123123;
            tt.strTmp = "테스트1";
            tt.ftTmp = 0.123213f;

        }

        #region 사용자 정의함수...
        private   byte[] StructToBytes(object obj)
        {
            //구조체 사이즈 
            int iSize = Marshal.SizeOf(obj);

            //사이즈 만큼 메모리 할당 받기
            byte[] arr = new byte[iSize];

            IntPtr ptr = Marshal.AllocHGlobal(iSize);
            //구조체 주소값 가져오기
            Marshal.StructureToPtr(obj, ptr, false);
            //메모리 복사 
            Marshal.Copy(ptr, arr, 0, iSize);
            Marshal.FreeHGlobal(ptr);

            return arr;
        }

        private T ByteToStruct<T>(byte[] buffer) where T : struct
        {
            //구조체 사이즈 
            int size = Marshal.SizeOf(typeof(T));

            if (size > buffer.Length)
            {
                throw new Exception();
            }

            IntPtr ptr = Marshal.AllocHGlobal(size);
            Marshal.Copy(buffer, 0, ptr, size);
            T obj = (T)Marshal.PtrToStructure(ptr, typeof(T));
            Marshal.FreeHGlobal(ptr);
            return obj;

        }
        #endregion

        //버튼 이벤트...
        private void button1_Click(object sender, EventArgs e)
        {
            bTmp = StructToBytes(tt);
            label1.Text = bTmp.Length.ToString() + " bytes";
        }

        private void button2_Click(object sender, EventArgs e)
        {
            t_Test tTmp = ByteToStruct<t_Test>(bTmp);

            label2.Text = "int 값: " + tTmp.iTmp.ToString();
            label3.Text = "double 값: " + tTmp.dbTmp.ToString();
            label4.Text = "float 값: " + tTmp.ftTmp.ToString();
            label5.Text = "string 값: " + tTmp.strTmp;

        }


    }
}


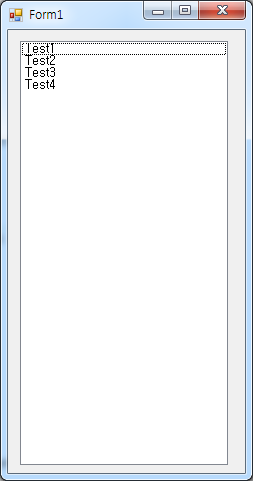
* 실행한 결과...


반응형
반응형

* 크로스 스레드

 - 자신의 스레드가 아닌 다른 스레드가 그 컨트롤에 접근했었을 때 발생하는 오류


* 해결 방법


Form1.cs 

using System;
using System.Collections.Generic;
using System.ComponentModel;
using System.Data;
using System.Drawing;
using System.Linq;
using System.Text;
using System.Windows.Forms;

using System.Threading;

namespace CrossThread
{
    public partial class Form1 : Form
    {

        /* 
       스레드의 동작을 제어하는 메서드 
       Abort():강제 종료 
       Interrupt():대기 중인 스레드를 중단 
       Join(): 스레드가 종료될 때까지 호출 스레드를 차단 
       Sleep(int millisecondsTimeout): 지정된 시간(밀리초)동안 스레드를 중지 
       Start(): 스레드 시작 
       Suspend(): 일시 중지 
       Resume(): 일시 중지된 스레드 수행 
       */

        Thread thMain;
        bool bThread = false;

        //스레드 최초 한번 실행...
        bool bThreadStart = false;


        #region 3번째 방법...
        //3번째  방법 델리게이트 선언...
        delegate void TextBoxDelegate(string strText);
        //3번째  방법 델리게이트를 위한 함수 선언...
        private void TextBoxFunc(string strText)
        {
            txtThread.Text = strText;
        }
        #endregion

        public Form1()
        {
            InitializeComponent();

            //1. 첫번째 해결 방법 
            //CheckForIllegalCrossThreadCalls = false ;

            thMain = new Thread(new ThreadStart(Thread_Timer));
            thMain.IsBackground = true;                            //스레드를 백그라운드로 지정...
                                                                   //기본 : 포어그라운드 차이점 => 프로그램 종료시 백그라운드 스레드는 하던일 멈추고 같이 종료...
                                                                   //                                              포어그라운드 스레드는 하던일 다 하고 나면 종료...
        }

        private void Form1_FormClosed(object sender, FormClosedEventArgs e)
        {
            //스레드 종료...
            if (thMain != null)
            {
                if (bThreadStart)
                {
                    thMain.Abort();    //강제 종료...
                }
                else
                {
                    thMain.Interrupt(); //대기중인 스레드 종료...
                }
                
                thMain = null;
            }
        }

        //버튼 이벤트...
        private void button1_Click(object sender, EventArgs e)
        {
            //최초 한번만 실행...
            if (!bThreadStart)
            {
                bThread = true;
                bThreadStart = true;
                thMain.Start();
            }
            //일시정지...
            else
            {
                bThread = true;
                thMain.Resume ();
            }
            
        }
        private void button2_Click(object sender, EventArgs e)
        {
            if(bThreadStart)
            {
                 bThread = false;
            	 //일시 정지 된 스레드 다시 실행...
            	 thMain.Suspend ();  
            }
        }

        void Thread_Timer()
        {
            while (bThread)
            {

                try
                {
                    //크로스 스레드 오류 내기...
                    //txtThread.Text = "크로스 스레드 예제...";

                    //2번째 방법...
                    /*
                    if (txtThread.InvokeRequired == true)
                    {
                        //다른 스래드이다...
                        this.Invoke(new Action(delegate()
                        {
                            txtThread.Text = "크로스 스레드 예제...";
                        }));
                    }
                    else
                    {
                        //같은 스래드이다...
                        txtThread.Text = "크로스 스레드 예제...";
                    }
                     */

                    //3번째 방법으로 사용 예제
                    this.Invoke(new TextBoxDelegate(TextBoxFunc), "크로스 스레드 예제...");


                }
                catch (Exception ex)
                {
                    MessageBox.Show("오류 : " + ex.Message.ToString());
                }
                

                Thread.Sleep(1000);
            }
        }

    }
}


위 소스 예제를 보시는 바와 같이 1,2,3 번째 방법 으로 예제를 만들어 보았습니다.

* 요약

[C#] 델리 게이트 (Delegate) - 1 델리게이트란? , 선언 방법과 간단한 예제


[C#] 델리 게이트 (Delegate) - 1 델리게이트란? , 선언 방법과 간단한 예제

*델리 게이트(Delegate) - 대리자 로써 C 언어나 C++ 언어 를 공부한 사람이라면 쉽게 접할 수 있는 함수 포인터와 비슷한 기능을 합니다. 또한 콜백 함수 기능 역할도 수행 *델리 게이트 선언 방법과 간단한 예제..

kdsoft-zeros.tistory.com

[C#] 델리 게이트 (Delegate) - 2 델리게이트 콜백과 사용 그리고 체인


[C#] 델리 게이트 (Delegate) - 2 델리게이트 콜백과 사용 그리고 체인

앞서 간략 하게 델리게이트가 무엇이며 선언 방법과 사용은 어떻게 하는지 알아 보았습니다. 하지만 사용 방법에 있어 왜 굳이 델리게이트를 사용하지 그냥 함수를 호출 하면 되지 않을까? 그게 더 효율적이지 싶..

kdsoft-zeros.tistory.com


반응형
반응형

C# Indexer는  클래스 속성(Property)에 특별한 문법인 this[ ] 를 써서 클래스 내부의 어떤 데이타를 셋팅 및 리턴을 받을 수 있게 만드는 똑똑한 배열이라고 볼 수 있습니다.


* 예제

using System;
using System.Collections.Generic;
using System.Linq;
using System.Text;

namespace Indexer2
{
    class IndexerClass
    {
        //배열 크기 기본 10
        private const int index_MAX = 10;

        // 내부의 정수 배열 
        private int[] idata = new int[index_MAX];

        // 인덱서 정의. 
        public int this[int index]
        {
            get
            {
                if (index < 0 || index >= index_MAX)
                {
                    throw new IndexOutOfRangeException();
                }
                else
                {
                    // 배열로부터 값 리턴
                    return idata[index];
                }
            }
            set
            {
                if (!(index < 0 || index >= index_MAX))
                {
                    // 배열에 값 저장
                    idata[index] = value;
                }
            }
        }
    }

    class Program
    {
        static void Main(string[] args)
        {

            IndexerClass icls = new IndexerClass();

            // 인덱서 set 사용
            icls[1] = 3096000;

            // 인덱서 get 사용
            int iValue = icls[1];

            //값 확인
            System.Console.WriteLine(iValue.ToString());
            System.Console.WriteLine("Press the Enter key to continue.");
            System.Console.ReadLine();
        }
    }
}


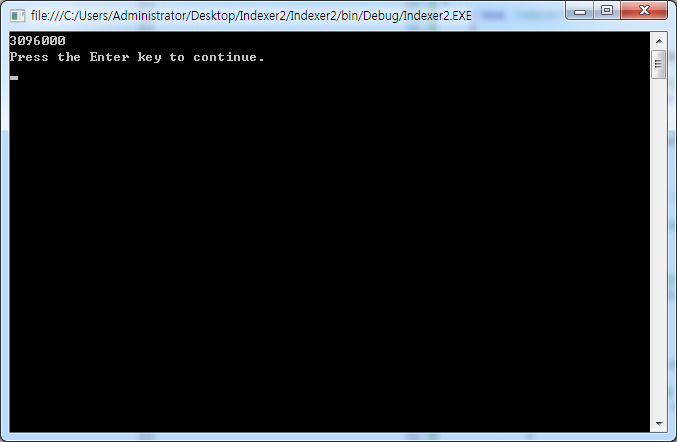
위의 예제와 같이 클래스 내부에 정수형 배열 선언과 클래스 속성에 인덱서를 정의 하여 마치 클래스 속성을

배열 처럼 사용 하여 보았습니다.

이번에는 제네릭과 인덱서를 같이 활용한 예제를 만들어 보겠습니다.


- 제네릭 클래스

using System;
using System.Collections.Generic;
using System.Linq;
using System.Text;

namespace Indexer
{
    class Indexer<T>
    {
        //T 제네릭 : 데이터 자료형에 관한 것...Ex) int, byte, String, float, double 형 등등 

        public T[] Items;

        #region 생성자...
        //기본 인덱서 클래스 내 아이템 변수 10개...
        public Indexer()
        {
            Items = new T[10];
        }
        //사용자가 직접 크기 결정...
        public Indexer(int iSize)
        {
            Items = new T[iSize];
        }
        #endregion

        #region 속성...
        //인덱서 정의...
        public T this[int index]
        {
            get
            {
                return Items[index];
            }
            set
            {
                Items[index] = value;
            }
        }

        public int FnLength
        {
            get
            {
                return Items.Length;
            }
        }

        #endregion

    }
}

- 폼 메인화면


using System;
using System.Collections.Generic;
using System.ComponentModel;
using System.Data;
using System.Drawing;
using System.Linq;
using System.Text;
using System.Windows.Forms;

namespace Indexer
{
    public partial class Form1 : Form
    {
        Indexer<int> idList_int = new Indexer<int>();
        Indexer<string> idList_Str = new Indexer<string>();

        List<int> ltList_int = new List<int>();

        public Form1()
        {
            InitializeComponent();

            for (int iCount = 0; iCount < idList_int.FnLength; iCount++)
            {
                //인덱서를 활용한 Array 
                idList_int[iCount] = iCount + 1;
                idList_Str[iCount] = (iCount + 1).ToString() + "Str";

                //Array 계열 List 사용
                ltList_int.Add(iCount + 1);
            }

        }

        private void button1_Click(object sender, EventArgs e)
        {
            listBox1.Items.Clear();
            listBox2.Items.Clear();

            for (int iCount = 0; iCount < idList_int.FnLength; iCount++)
            {
                listBox1.Items.Add(idList_int[iCount]);              //인덱서클래스 int 형 
                listBox2.Items.Add(idList_Str[iCount]);              //인덱서클래스 string 형
            }

            listBox1.Items.Add("========================================================");

            for (int jCount = 0; jCount < ltList_int.Count; jCount++)
            {
                listBox1.Items.Add(ltList_int[jCount]);             //List 배열
            }


        }
    }
}


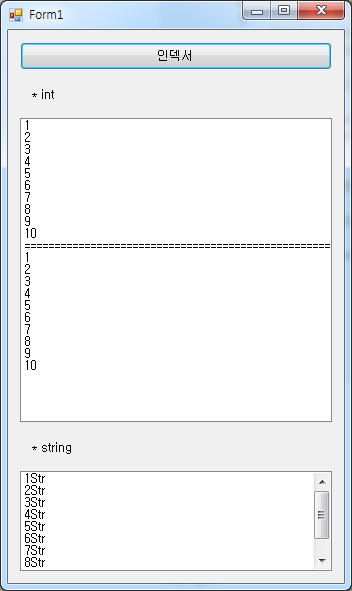
위 예제에서 보듯이 제네릭과 인덱서를 같이 활용하면 List 배열 처럼 사용 할 수 있습니다.

다만 List 배열과 가장 큰 차이점은 배열의 크기가 정해지느냐 안 정해지느냐 로 볼 수 있습니다.

반응형
반응형

앞서 간략 하게 델리게이트가 무엇이며 선언 방법과 사용은 어떻게 하는지 알아 보았습니다.

하지만 사용 방법에 있어 왜 굳이 델리게이트를 사용하지 그냥 함수를 호출 하면 되지 않을까?

그게 더 효율적이지 싶은데... 라는 의문도 생기실 수 있으실 겁니다. 

이번 시간에는 좀 더 그런 의문을 없애기 위해 델리게이트가 어떻게 사용 되는지를 알아보

겠습니다.


* 델리게이트 콜백

 - 내 함수를 줄테니 다시 되돌려줘 !!! 꼬옥 !!!


그림에서 보는 거와 같이 버튼을 클릭하여 클래스 이벤트를 발생 시키는 예제를 만들어 보았습니다.

이렇게 이미지로만 본다면 그냥 버튼 두개에 메시지 박스 뜨네 라고 생각 하실 수도 있겠습니다. 

Form1 메인 소스


위 소스와 같이 버튼을 클릭 했는데 Form 에 있는 Start 함수 End 함수를 직접 실행 하지 않았습니다. 

다만 Form 을 시작 할때 클래스를 초기화 하고 클래스 안에 선언되어있는 델리게이트에 

Form 에 선언한 Start(), End() 두 함수를 던져 주었을 뿐...

그리고 나서 클래스 이벤트에 그 델리게이트가 연결 되어 있습니다.


위 그림에서 보시는 거와 같이 클래스 에 델리게이트가 선언이 되어 있으며, 이벤트도 발생 하게 되어 있습니다.

Form 시작하기에 앞서 클래스 초기화를 했고 클래스에 선언된 델리게이트에 Form 내부 함수를 던져 주었으며,

그 델리게이트를 클래스 이벤트에 등록 하였습니다. 사용자가 버튼을 클릭 시 클래스 함수 Start() 와 End() 함수

를 실행 하게 되는데 각각 이벤트를 발생 시키는 코드를 가지고 있습니다.


이벤트가 발생이 되면 다시 Form에 있는 Start() End() 함수가 실행 되어 메시지 박스 그림을 보게 됩니다.


이와 같이 Form 함수를 넘겨주어 다시 되돌려 받는 델리게이트 콜백 및 사용 방법 이였습니다.


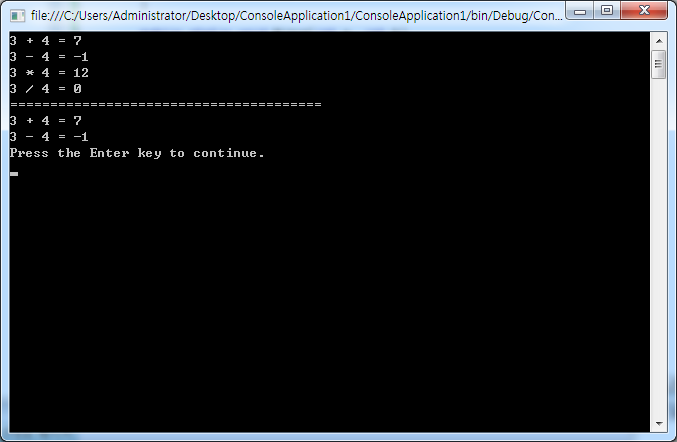
* 델리게이트 체인 : 하나의 델리게이트에 여러 개의 함수를 연결 시키는 것

[예제]
 
using System;
using System.Collections.Generic;
using System.Linq;
using System.Text;

namespace ConsoleApplication1
{

    delegate void OneDelegate(int a, int b);

    class Program
    {

        public static void Plus(int a, int b)
        {
            Console.WriteLine("{0} + {1} = {2}", a, b, a + b);
        }

        public static void Minus(int a, int b)
        {
            Console.WriteLine("{0} - {1} = {2}", a, b, a - b);
        }

        public static void Multiplication(int a, int b)
        {
            Console.WriteLine("{0} * {1} = {2}", a, b, a * b);
        }

        public static void Division(int a, int b)
        {
            Console.WriteLine("{0} / {1} = {2}", a, b, a / b);
        }

        static void Main(string[] args)
        {
			//델리게이트 초기화
            OneDelegate m = new OneDelegate(Plus); 
            
            //델리게이트에 함수들 추가
            m += Minus;
            m += Multiplication;
            m += Division;

            m(3,4); //등록된 함수들 실행

            //델리게이트에 등록된 함수 빼기
            m -= Multiplication;
            m -= Division;

            System.Console.WriteLine("=======================================");

            m(3,4);

            System.Console.WriteLine("Press the Enter key to continue.");
            System.Console.ReadLine();


        }
    }
}

[C#] 델리 게이트 (Delegate) - 1 델리게이트란? , 선언 방법과 간단한 예제


반응형

+ Recent posts